Category Archives: General Maintenence (Atlantic)

Wolfgang drives again.

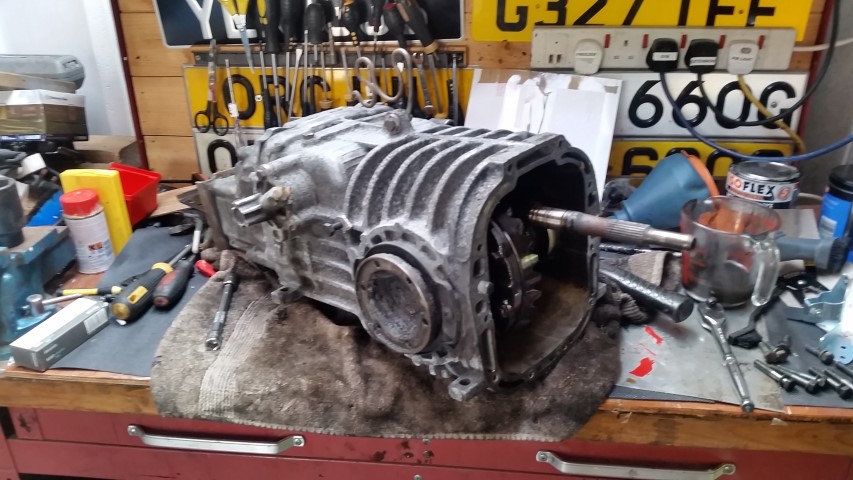
Leading on from the last post where I had built up the loan gearbox with new input shaft and diesel bell housing and just needed to fit to the van…

I was quite proud of myself as far as the logistics and organisation of tools and other components were concerned. The work I was undertaking was away form home and as a result away from the comfort and safety of my reasonably extensive tool collection. I had thought long and hard about the process I needed to go through to remove the gearbox a week or so before, and I had done the same for the installation of the new gearbox to make sure I was suitably equipped for the task. The barn I was working in wasn’t a million miles away from home, but best part of an hour round trip would have been remarkably frustrating if I found myself lacking a socket or spanner.

I arrived at the barn in my smart car with the gearbox in the boot just after 9am on the Thursday morning. The day was pleasant and had a nice summery feel to it which put me in a good / positive frame of mind.
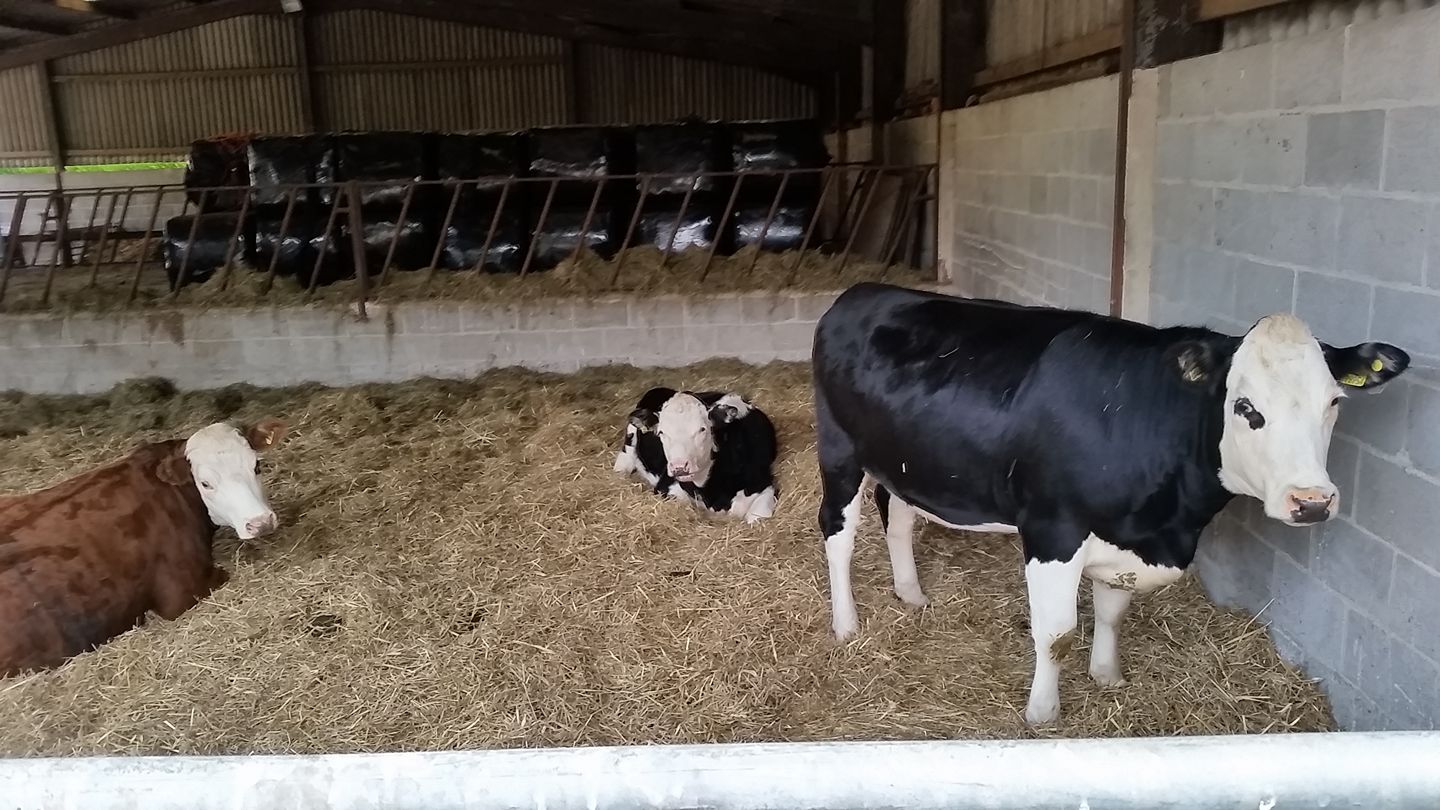
Onlookers

The appearance of some very inquisitive cows in the barn opposite put a smile on my face before work commenced. I was quietly confident that I should be able to fit the gearbox without assistance by positioning it on two trolley jacks and elevating them once slid into position. In my head it was that simple, but the reality was proving quite the opposite. A friend had offered to help in the afternoon if I was struggling, but I hoped not to have to bother him. However, after two hours on my back, my shoulder blades becoming increasingly sore, and my eyes aggravated from dirt particles, I had to concede and take him up on his offer.

During my two+ hour battle in trying to get the box into position, I had noticed that the steel gearbox mount at the front of the box looked like it was never going to match up correctly with the bodywork. This got me thinking that maybe, just maybe the petrol and diesel mounts were different length. I couldn’t verify this during my struggle, but as lunchtime approached, and I had to scuttle back home to collect my friend, I thought it wouldn’t do any harm to collect the other mount and match it against the one on the box I was trying to fit.

An hour later, I was back at the barn with Simon. A quick shifty under the van confirmed my suspicion was correct. The mounts were subtly different. The box needed dropping, wheeling out and the mount swapped over. After best part of four hours my positive mood had started to ebb, but my friend was as positive about the install as I had been at the start of the day. This proved infectious as we both set to work. Within minutes the gearbox was in position and nuts and bolts were being tightened up. Ancillaries on, drive shafts connected and the van fired up and rolled off the ramps by 4.30pm. I was pleased that it had all come together so quickly, but I still needed to drive the van to find out if it was good or not. My three week September holiday hinged on this box being a worker.

I loaded the van with all tools, ramps, trolley jacks etc that had been used throughout the day, and Simon jumped in the passenger seat. We set off from the barn towards home leaving my smart car behind. I was very mindful of the feel of the gear lever and the selection of the gears as we moved from quiet country road, to the increasingly busier city roads of Derby. By the time we got home I was confident that if there were going to have been any issues, they would have been picked up during the half hour drive home. Suffice to say I was buzzing, and for the first time in months I could start looking forward to a holiday in the campervan. I knew that both Kev and Simon were partial to a splash of whisky, so that evening I dropped by with a bottle for each. Kev for the loan of his gearbox, and Simon for his much needed assistance.

Anyways, we decided to have a family get together at our local park, Calke Abbey to celebrate Wolfgang’s resurrection on the Sunday. Weather was great and all enjoyed.
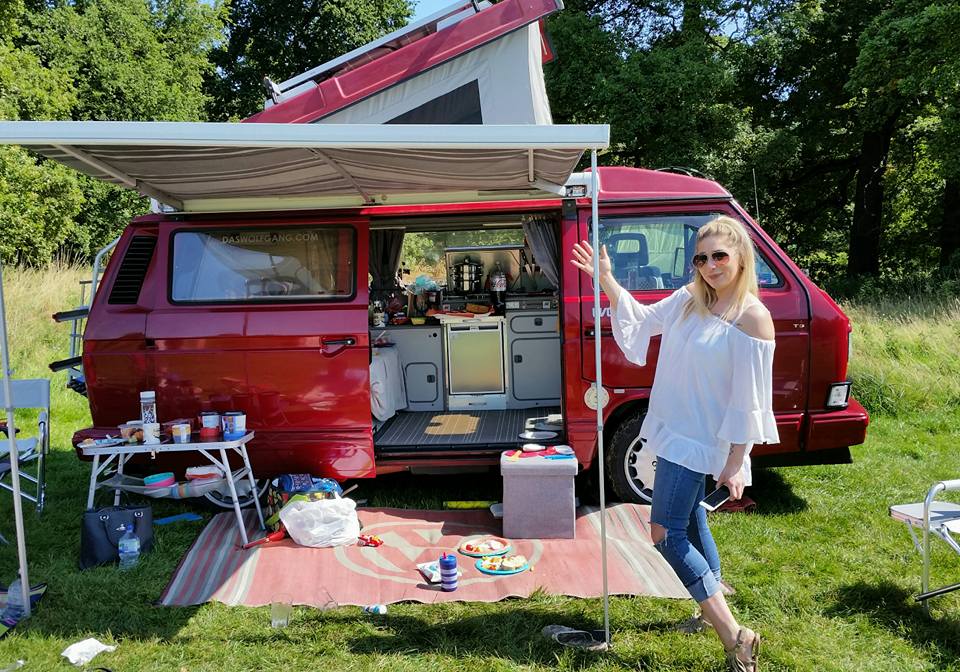
One very relieved owner

Roll on September 🙂

The roller coaster continues!

After the epic failure, and massive disappointment of not being able to have our dream holiday in the campervan back in May due to mechanical issues, the agony has been prolonged by restrictions on using the van over any distance until the gearbox has been replaced.  A lengthy lead time of two months on getting my gearbox into the specialist left me feeling slightly frustrated, but mid July arrived and the box was delivered in person.

A month or so later and the refurbishment of my original gearbox seemed to be taking a lot longer than expected. Not exactly sure why but I’ve decided to take a friend up on the offer of loan gearbox to tide me over. I originally considered this option a couple of months previously to keep my van mobile in the interim but decided to wait. However, as my September holiday looms I have had to fall back on this as my only real possibility of getting my van roadworthy in time.

Pulling a gearbox out and replacing with another would normally be something I would leave to the experts, but the tight schedule means no availability in the  only garage I really trust to do the job properly. So needs must. I rolled my sleeves up and got stuck in. All be it a little reluctantly.

Leaking Gearbox Out

The loan gearbox was petrol, so there was always going to have to be changes made before fitting to my diesel van. The bell / clutch housing needed to be swapped over along with the input shaft. After draining the oil from both boxes I split the clutch housing from the gearbox.

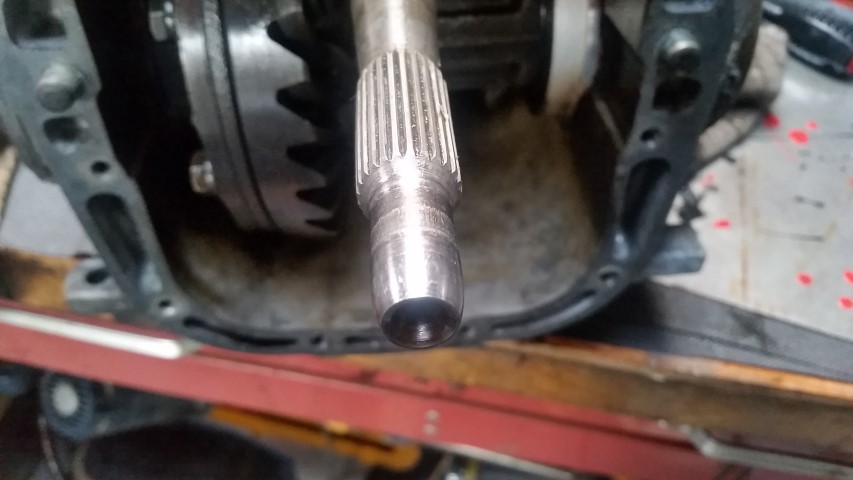
Then I proceeded to change the shaft. However, on close inspection I found the diesel input shaft to be pretty badly worn where it sits in the clutch spigott bearing.

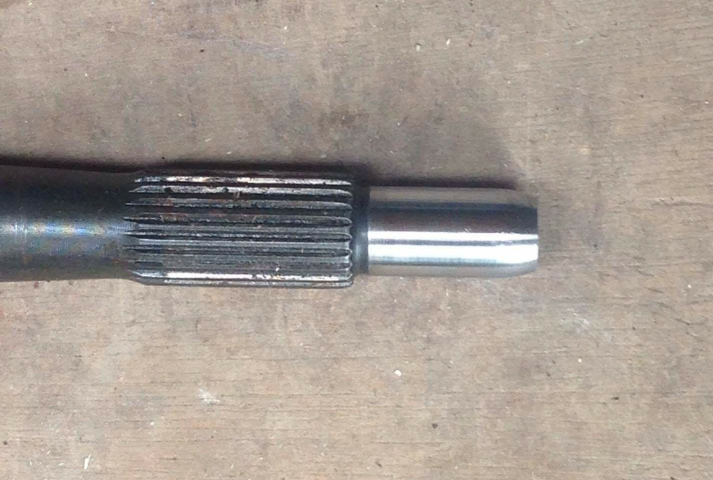
Clearly I wouldn’t want to jeopardize the next holiday by turning a blind eye to something I could rectify prior to fitting the gearbox. So I posted on social media to see if anybody had a replacement I could use. Within an hour or so I had a bite, and by the end of the day I had images as proof of the condition of a good replacement part.

The wonders of Paypal meant that my part was on its way the following day. The clutch housing has also fitted with a new input shaft seal, and 4.5l of gearbox oil purchased in readiness of gearbox rebuild completion. Hopefully, the van should be back on the road in a matter of days 🙂

Big Mirror refurb

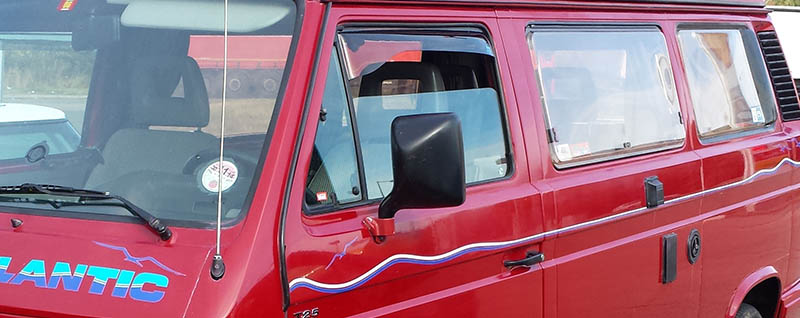
The Atlantic was one of the few vans that came with big mirrors as standard. These were always colour coded from factory in one of three available colours. White, calypso green or red. My van on the other hand came with mat black mirrors.

black mirrors

This didn’t particularly bother me as I always knew I would get round to painting them at some point. It’s just never really been a priority, what with the van getting plenty of use during both winter and summer. However, my current situation means Wolfgang is off the road for the time being, so this became an opportunity….(always need a positive spin with these vans ?)

Unfortunately, its not quite as simple as just unscrewing them via the visible screws on the door bracket. They are heated and servo adjustable from a switch module on the left hand, drivers door. This means that the door cards have to come out on both sides. The fallowing video is a guide to removing the door cards for anybody that may need to perform this process: (courtesy of Van-Again on YouTube)

Below is my door after card removal:

Door card stripped

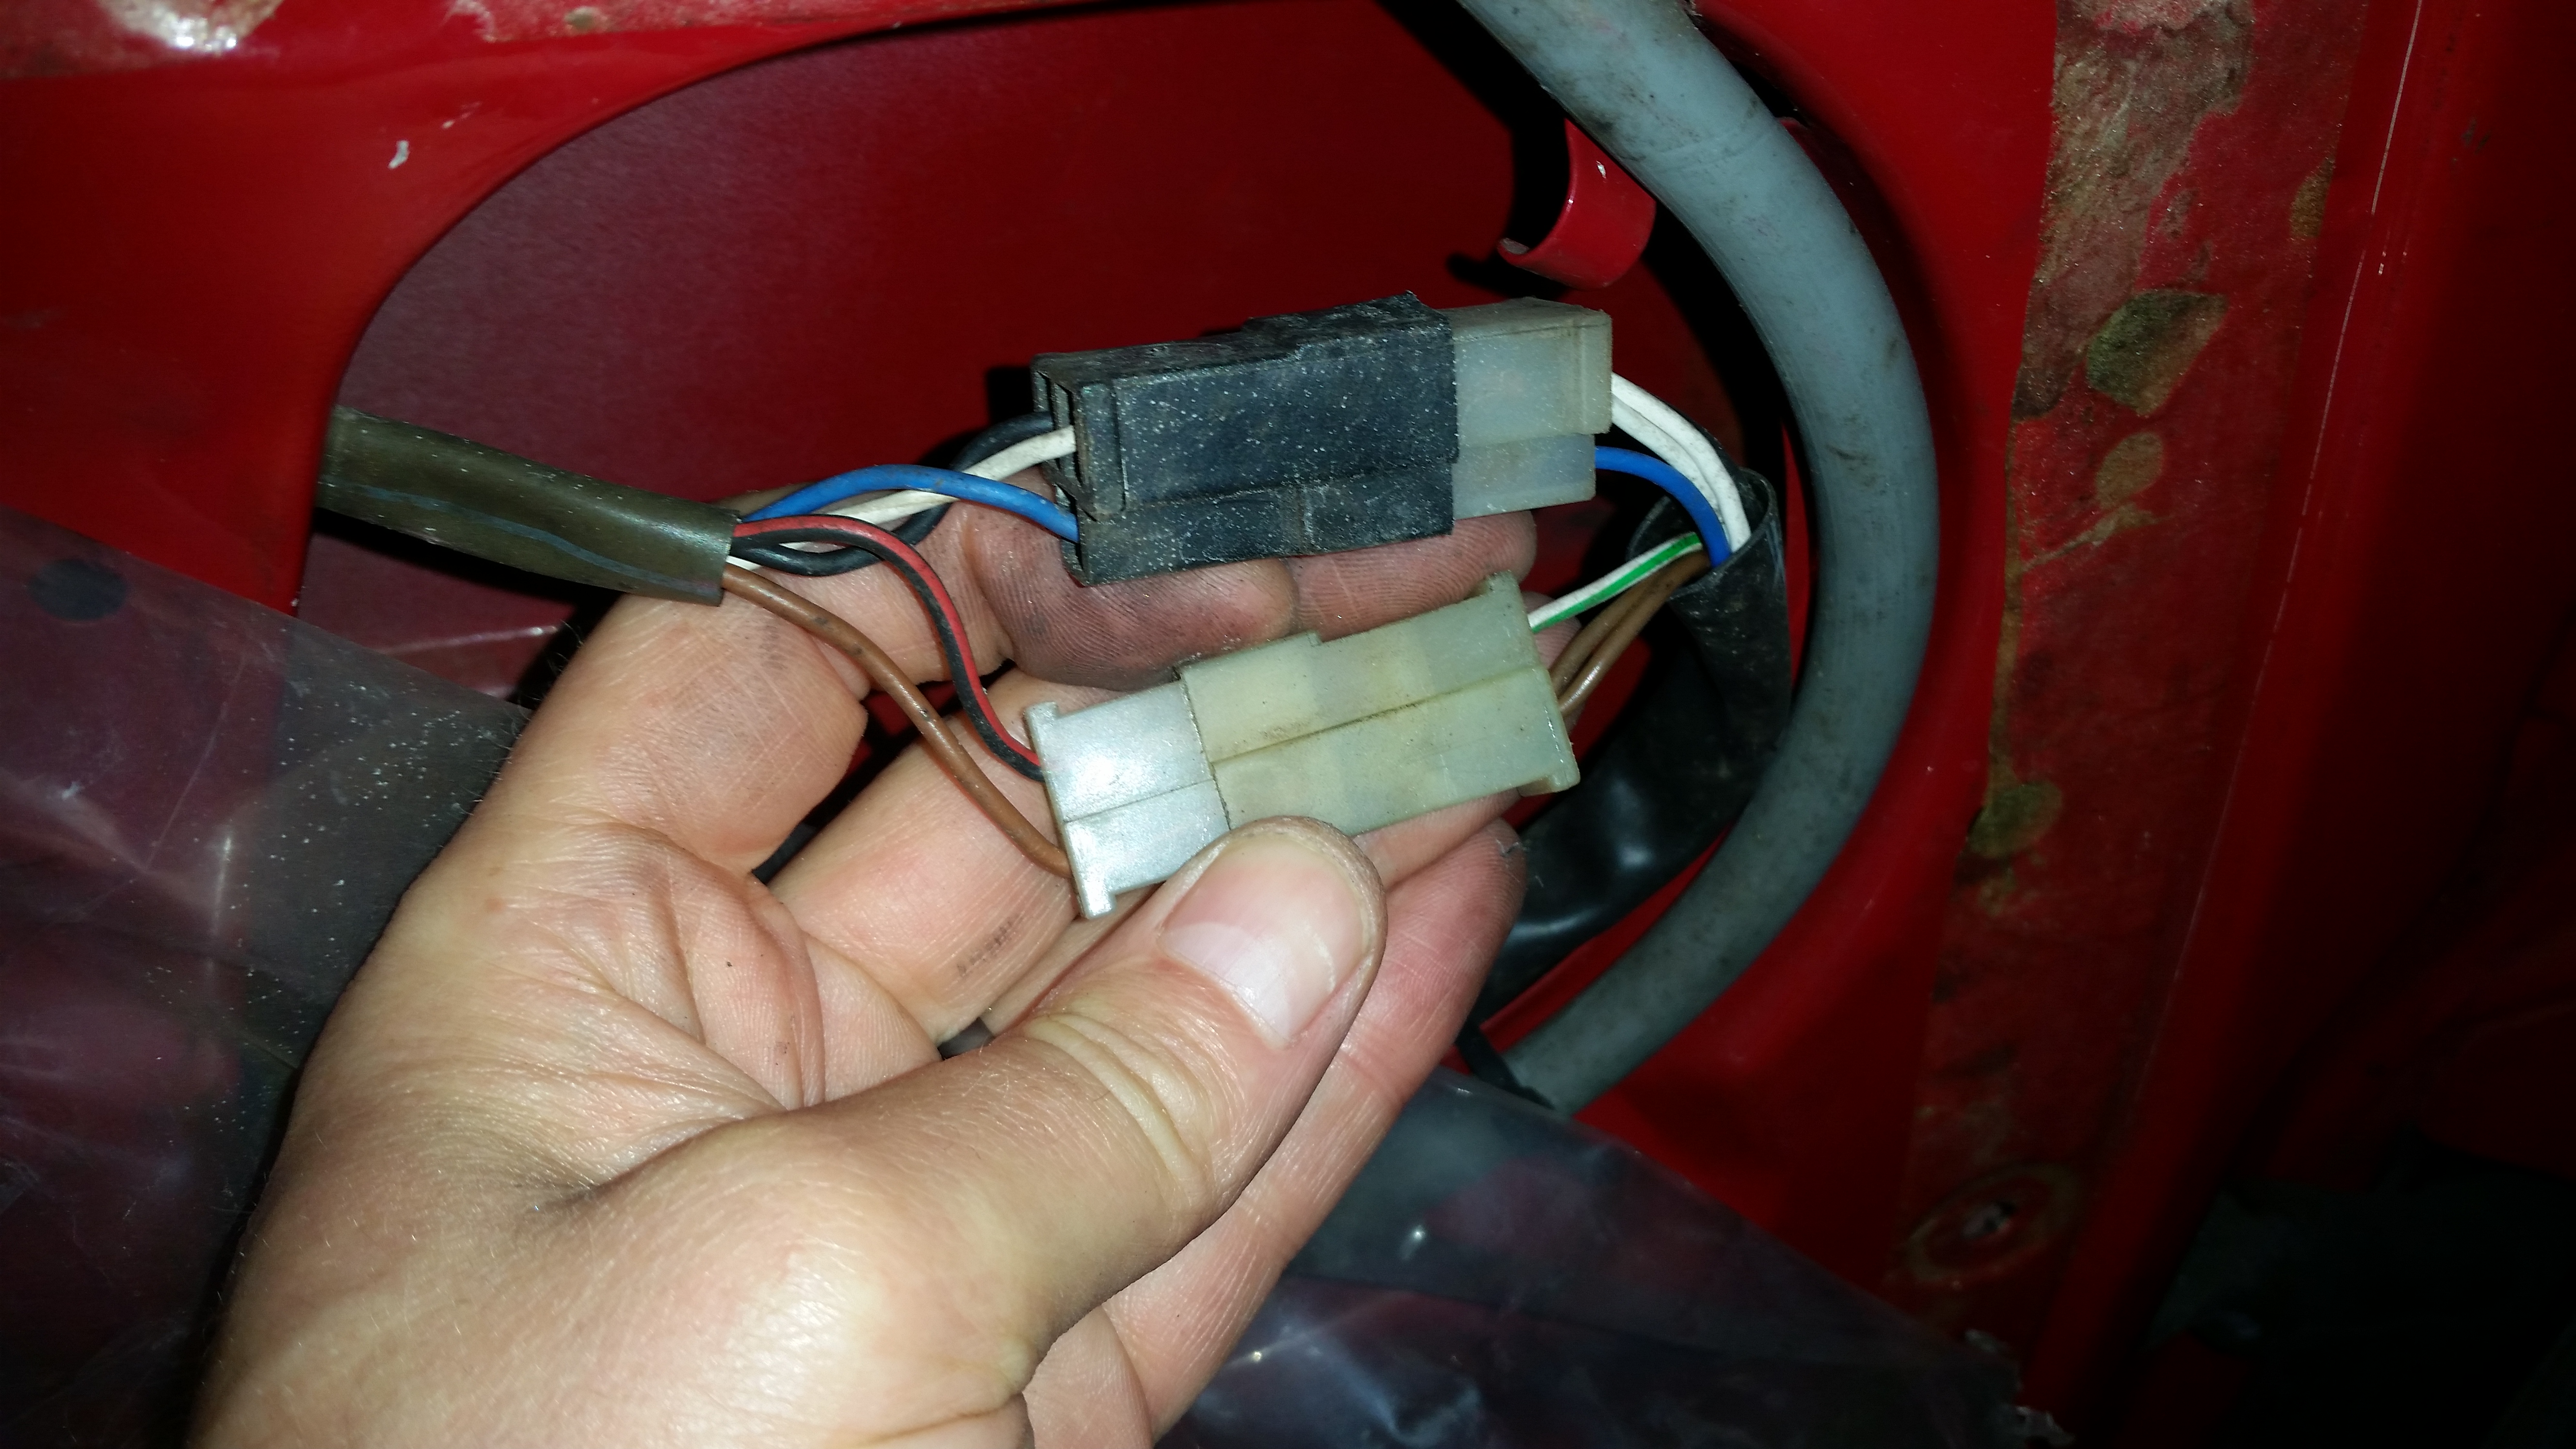
Then  electrical ‘block’ connector needs disconnecting and stripping….

Electrical block connector (needs striping)

after which the wires can then be passed through the small cable aperture to mirror.

Cable entry / exit hole in door

Its not massively difficult, but a little more involved than one would first imagine.

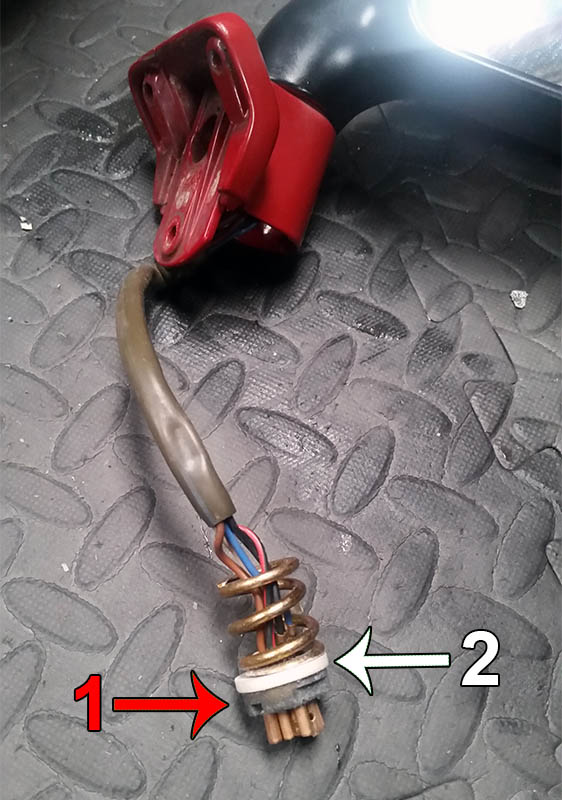
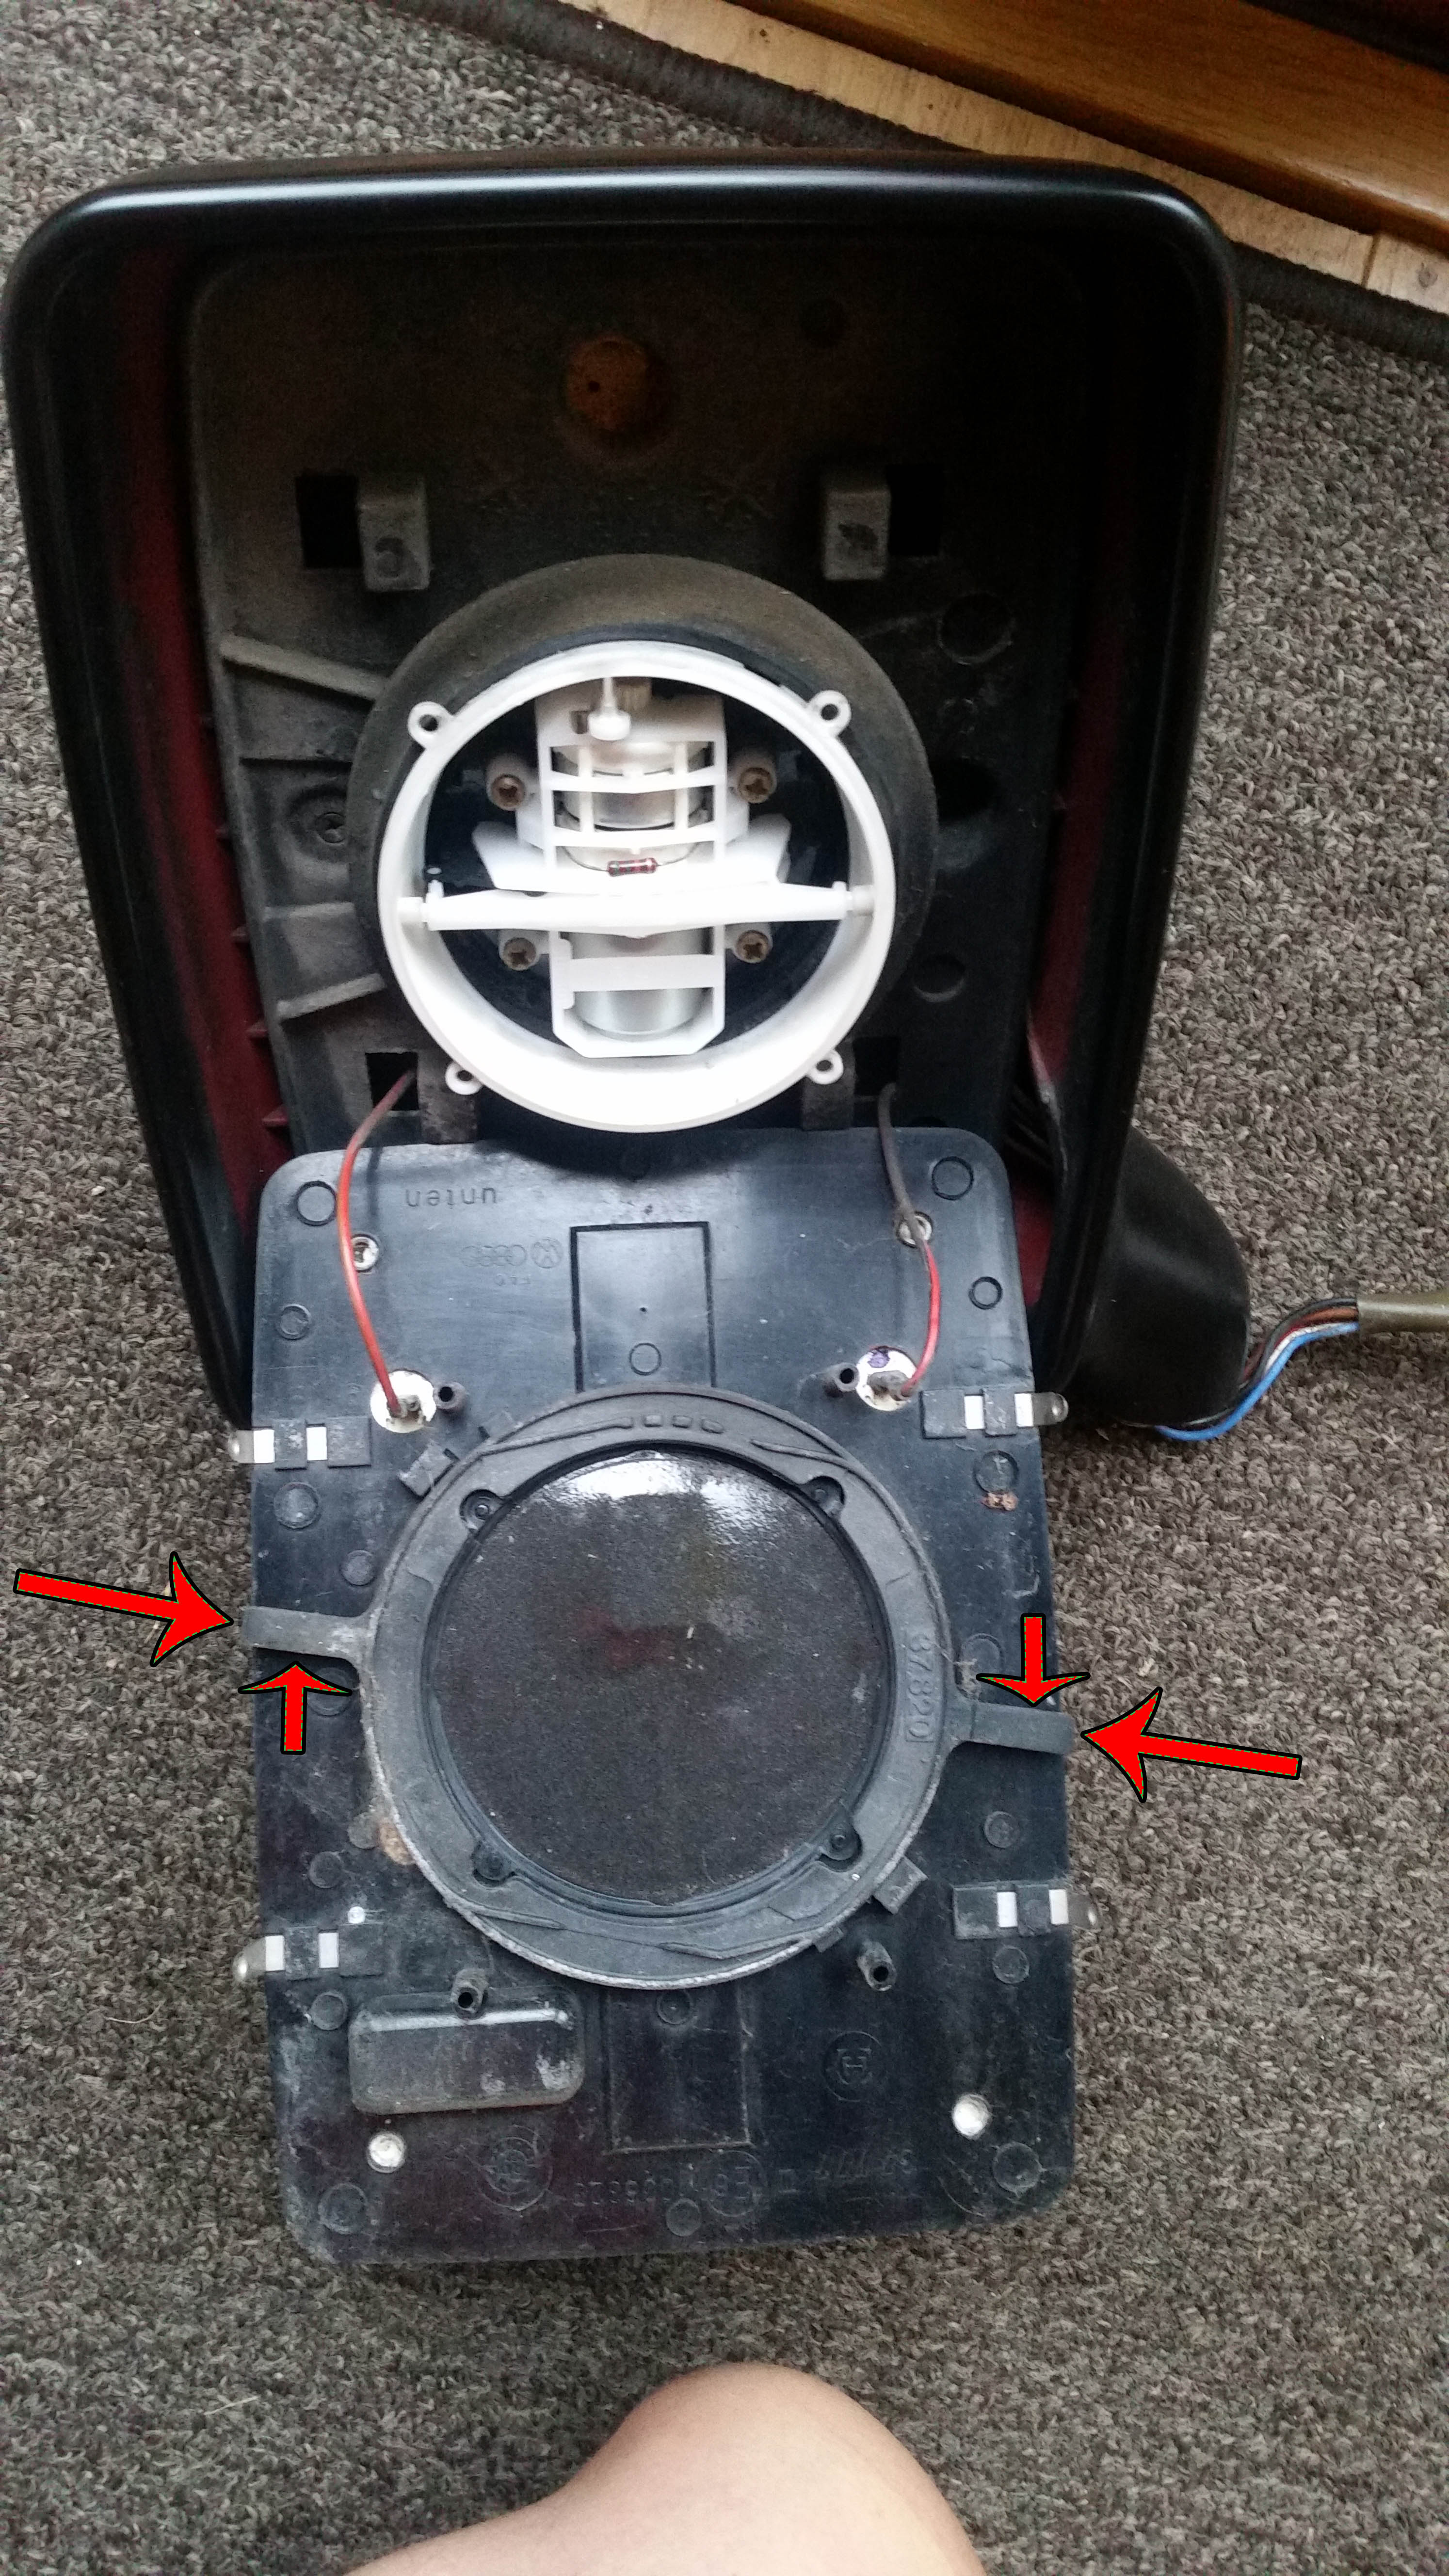
Then the mirrors need stripping into their basic components before paint.  Separating the bracket from the mirror was done using a pair of long nosed pliers . There is large slotted nut (1 in below image) that winds up against a perspex bush (2 in below image) and spring. Again, not the easiest thing to do especially if the nut hasn’t been removed for a number of years.

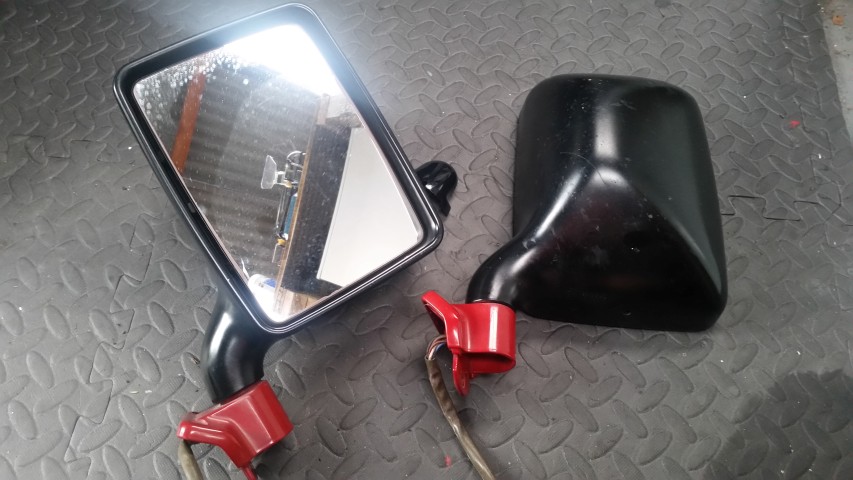
Mirror brackets removed

The mirror glass also needs to be removed. If you look closely in between the glass and the outer casing you can just see the two tabs sticking out on either side. Not particularly clear under instruction exactly how these hold the mirror in, but with a couple of knives carefully slotted down the side, and an up movement on one side, and down on the other, the mirror pulls free of the servo unit.

Wires connected to mirror are for heated / defrost function during cold weather

From the picture above I was slightly surprised to see the original colour inside the casing. I did strip one of the mirrors down even further in the hope that I could just send the plastics and bracket away for spraying, but realized the connectors on the end of the loom wouldn’t go through the hole in the bottom of the mirror. This meant they must have been crimped on after they were thread out of the aperture during construction at the factory. I wasn’t willing to cut them off and re connect after paint, so I left the whole servo assembly in the mirror. You can see more clearly the original paint in the photo below.

Original paint in mirror.

I can only assume that the original external paint must have gotten scratched, chipped or dis-couloured to the point where a previous owner decided to take matters into his own hands with a DIY spray-job using a can of mat black paint.

So this was just about as far as I could take it. I was considering getting a few rattle cans made up and having a go at painting them myself. However, these wouldn’t have been cheap, and these on top of the extra wet-n-dry emery paper and primer, would have meant that I probably wouldn’t be saving a great deal against the cost of a professional paint shop. So the paint was purchased and both mirrors and paint were taken to a body shop I had used previously to have my Fiamma Box painted.

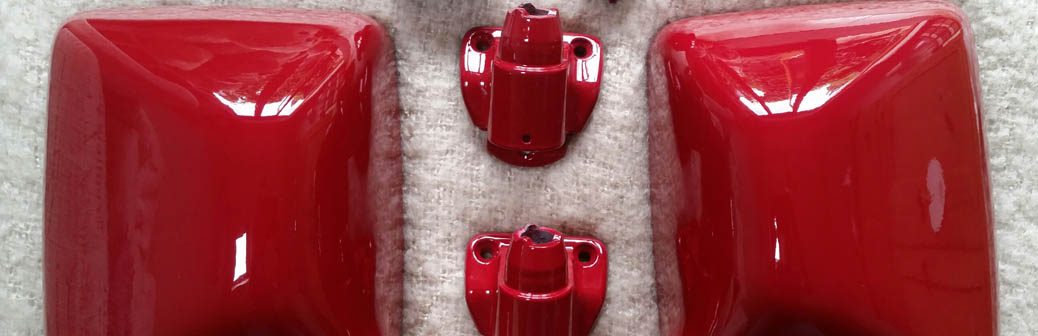
Two Days later I collected and I must admit I am pretty happy with the results . I just need to build them up and pop them back on the van 🙂

Rusty fuel tank

I knew that the fuel tank had some corrosion but wasn’t 100% sure just how bad it was. The van was in my local garage last year to have the coolant pipes replaced and the mechanic told me there were large sheets of rust coming from the top of the tank during some preliminary work. Long story short the garage never ended up fitting the pipes, and threw the towel in after he realised everything was going to take him a lot longer than he had anticipated due to the expanding workload. However, I had ordered the new tank based on his analysis, which sat in my garage for a number of month up until now. So the  engine upgrade  is currently in full swing, which is the perfect time to get this sorted.

Here is a picture the rusty tank taken off at the Brickwerks Workshop (Just so there is nothing left to the imagination). On the cusp of failure i would imagine 🙂

Caliper Replacment

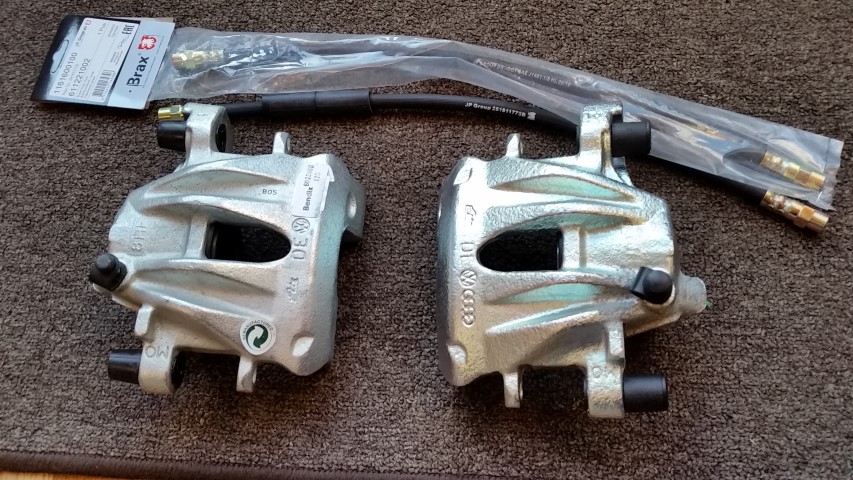
The off side caliper had been intermittently sticking  on a few separate occasions throughout the course of 2016. I had taken my van into my local garage for them to investigate the problem. Diagnosed as sticking on the caliper carrier was one suggestion, and after new wheel bearings and disk brakes the issues seemed to be resolved for a good few months. May 2017 I collected my van from storage and by the time I had got home the smell of hot components made me realize the issue had returned. The only possible option now was to replace the calipers themselves. Not cheap at near on £250 for the pair including new hoses.

There were two different types of caliper fitted to the Atlantic. Mine had come out of the factory with the  ‘Late ATE’ variety. They do not make these calipers anymore so the only option was a refurbished pair. Brickwerks was the chosen supplier. I was pleasantly surprised at just how well these had been reconditioned. They actually looked new. Clearly all new moving components and they had been plated.

As good as they looked, I knew that a good couple of coats of Smoothrite Red would assist against the elements, and give a brief flick of red through the wheel apertures. I had used Hammerite on my previous vehicle calipers. It was capable of withstanding pretty high temperatures, and didn’t discolor.


Liverpool – November Weekend Break

Mandy and I always make the effort to get away on our Birthday weekend which fall in February and November respectively. This used to be in the form of a B&B, or hotel in a nice location away from home. However, since we brought the camper its pretty much been an excuse to go away in the van.

2016-11-12 13.54.45 (Small)
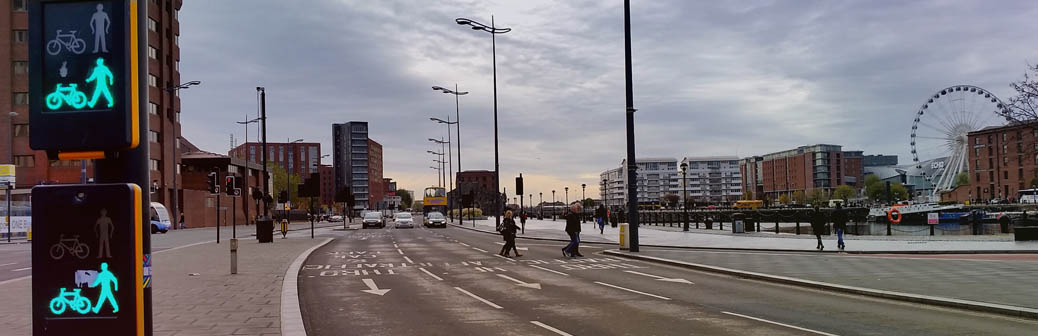
An example of Liverpool’s beauty

Come mid October we were struggling to decide on a location for my birthday. I saw a post on Facebook by somebody saying they had spent a night at Liverpool Marina in their camper, so we decided to investigated the option by looking at the Marina website ,and sending an email for prices and availability. The response was £15 per overnight stay in the outer car parks, which included access to shower facilities.  The price was fine as a room in a hotel or B&B in the center of Liverpool would have been upwards or £80. However, information on the camping location was sketchy, so Mandy and I were understandably apprehensive. We decided to commit to the weekend in the hope that it would work out for the ok. Nothing ventured, nothing gained.

Saturday 12th started well for me. I got presents and cards 🙂 . The weather on the other hand was dull and rainy 🙁 . We set off from Derby mid morning, and arrived at Liverpool just as the rain stopped and the sun came out. The post code we used in the Sat-Nav positioned us in a car park with a few campervans. Initially we thought it was the right location and were a little dissapointed at the lack of boats. There was water, but no boats. It soon became apparent we were in the wrong place as the Marina Yacht Club was nowhere to be seen. A short drive lead us to the right location where we found a nice spot on the edge of the car park to set the van up.

2016-11-14 09.24.46 (Small)

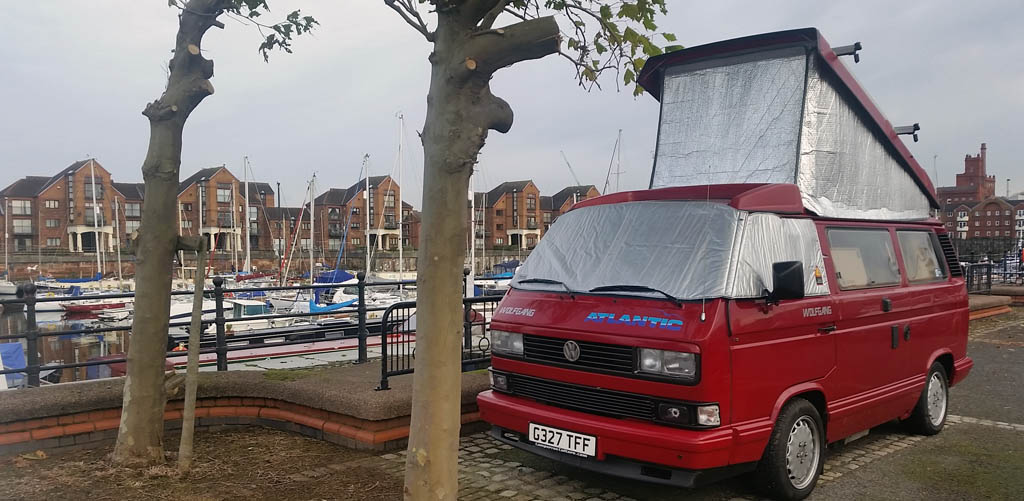
This gave us great views of the boats in the Marina.

Pitched Up and ready to hit the city

We popped into the Yatch Club to make our presence known, collected a swipe card to enable access the shower (£10 deposit), and paid for two nights parking (£30). We soon got our bearings and headed towards Albert Dock. This was a 15 minute walk along the River Mersey past the Liverpool Exhibition Center, BT Convention Center and the Echo Arena.

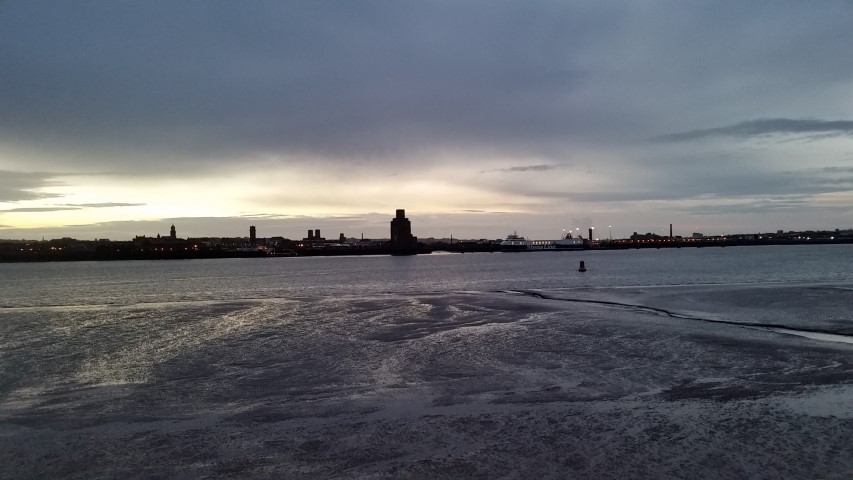
Mersey at low tide
Mersey at low tide

We had been to Liverpool in the past. The first time was a coach trip to the cavern club for an evening, and a couple of times after that where we parked up at the main shopping complex ‘Liverpool One’. On all  occasions we only saw a very limited portion of what the city had to offer. It’s not surprising that our impression of Liverpool was a little muted. That said, the regeneration and new developments seen on the brief walk from Marina to the Albert Docks was certainly giving me a reason to question my opinion. Over the course of the afternoon, my view of Liverpool changed dramatically for the better.

[huge_it_gallery id=”13″]

The quays, wharf’s, docks, architecture, museums and colorful history makes Liverpool one of the most interesting City’s to visit. I really couldn’t believe that  we had missed such a lot previously. Saturday afternoon gave us a great overview of the docks and its location in relation to the other areas we were more familiar with. A coffee at Nero, a meal at one of our favorite restaurants Zizzis, in combination with plenty of fresh air and  walking made the day pretty much perfect. Suffice to say we both slept extremely well that night.

2016-11-13 19.16.40 (Small)

Sunday was Armistice day. This always fell on my birthday weekend so  we were used to being cought up in the excitement of the parades. This year was different. We had a leisurely start to the day because we didn’t feel the need to rush being so local to the city center. We had a shower, a cuppa & breakfast, then set off on a brisk walk up the now familiar ‘Kings Parade’  to the Albert Docks. We were so distracted by the shops and attractions at the docks, by the time we realized it was almost midday and we had missed the parade 🙁  …but I found this on youtube  🙂

On the Saturday I had seen some small ferries giving guided tours of the docklands and river. I decided that this would be a great way to pass some time and learn a little about the history of the area. Unfortunately no ferries were running on Sunday because of armistice day. So we settled for an open top bus tour.

The temperature in the afternoon dropped so this was a chilly experience, but it was a great way to see far more of the sights than we would have been able to on foot. One fact I  learnt was “Liverpool has more grade 1 & 2 listed buildings outside of London than anywhere else in England” .

Anyways, we stayed a second night at the Marina before heading home the following day. In summary a really great city break on a real budget. Highly recommended for anybody that has a campervan / motorhome 🙂

Radius arms / chassis mounting (Brickwerks)

I decided to take my van to Brickwerks for a service some 6 months or so after buying it back in May 2015. I’m a bit precious about my vehicles and have found myself in a situation on numerous occasions in the past not really trusting the run of the mill, modern car garage. So the first visit was for one day which included a service, inspection and a fix of anything that was clearly not right and fixable within the constraints of the day. So from there we had a list. One year on and my van was in for a minor service to follow on from the full one in 2015, and a brief to chip away at the already identified issues. All good in the hood….Not quite!

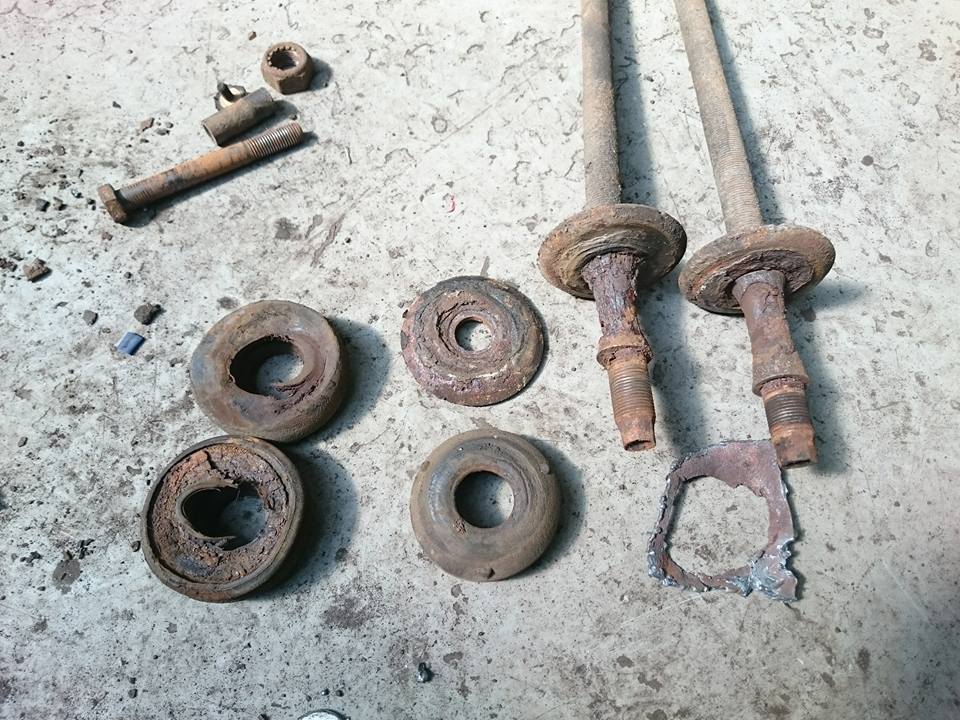
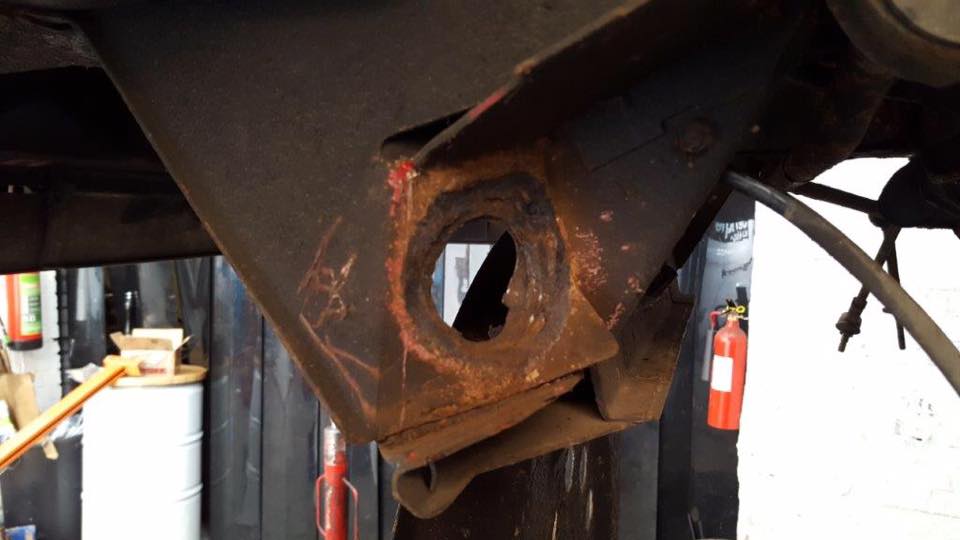
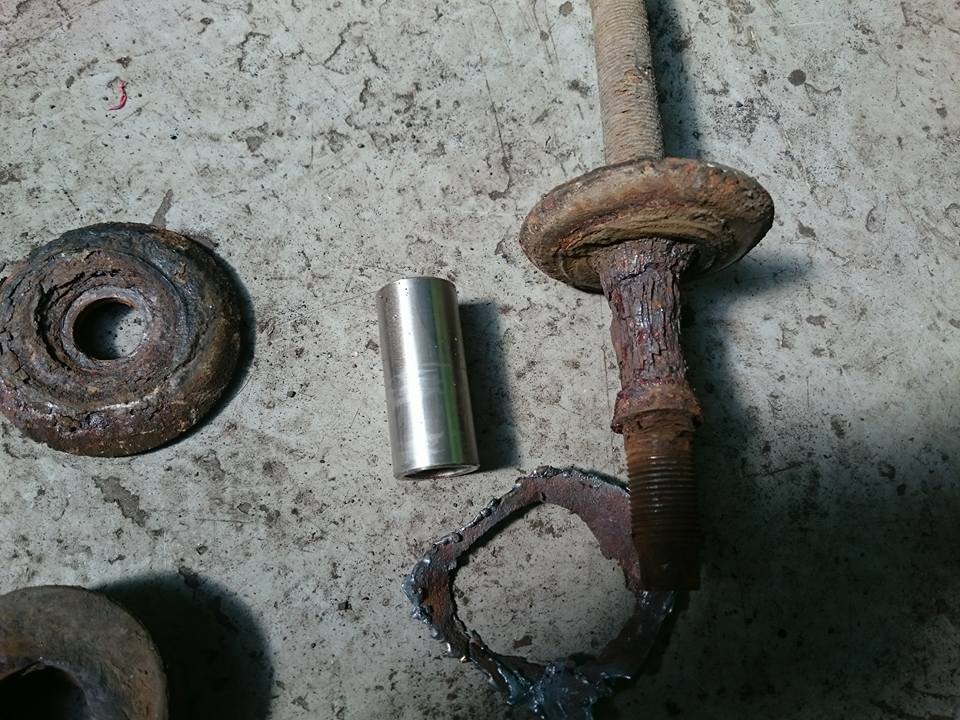
It soon became apparent that I had some quite serious issues as a result a distinct lack of maintenance by the previous owners. Radius arm bushes were identified as being perished on the first visit, and although this on it’s own is not uncommon, the fact that after further investigation it was quite conceivable that none of the associated components had ever had any maintenance since it left the factory in 1990.

Radus8
Radius arm and perished bushes
Radius1
Massively damaged body mount aperture

After viewing these parts it dawned on me that if these issues hadn’t been identified during this visit, structural failure was going to happen at some point in the not too distant future. I’m not complaining, but this unforeseen issue was now at the forefront of my vans visit to Brickwerks.

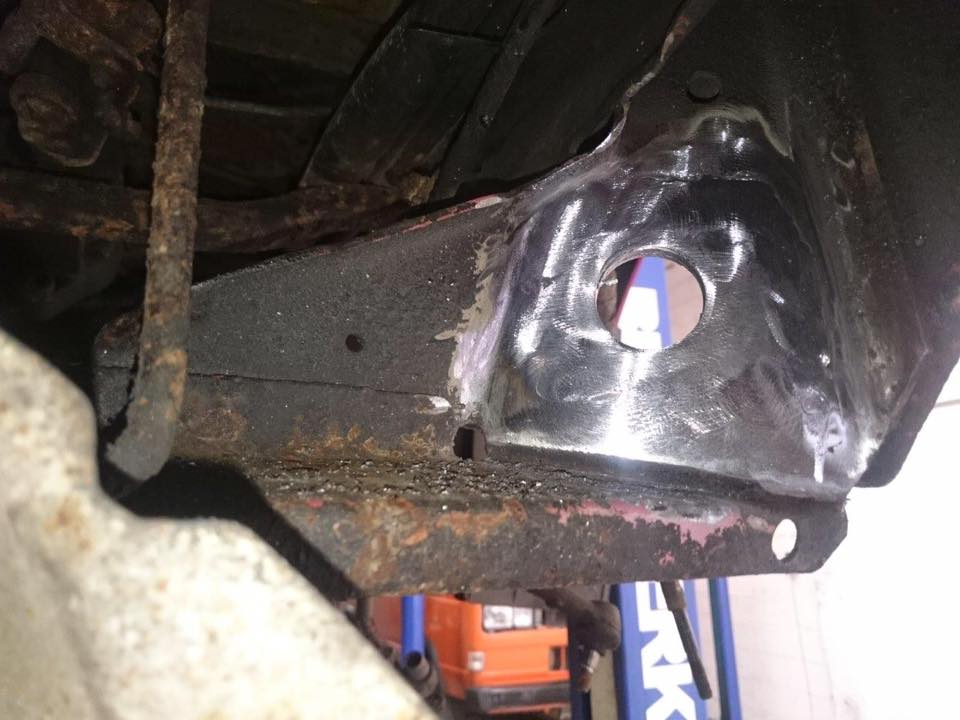
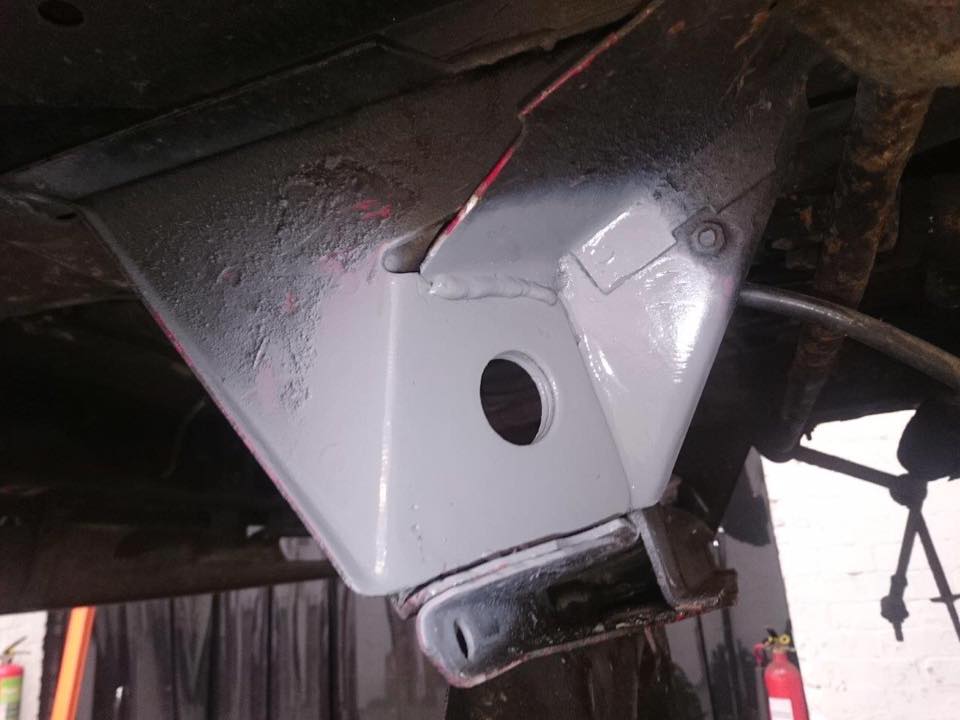
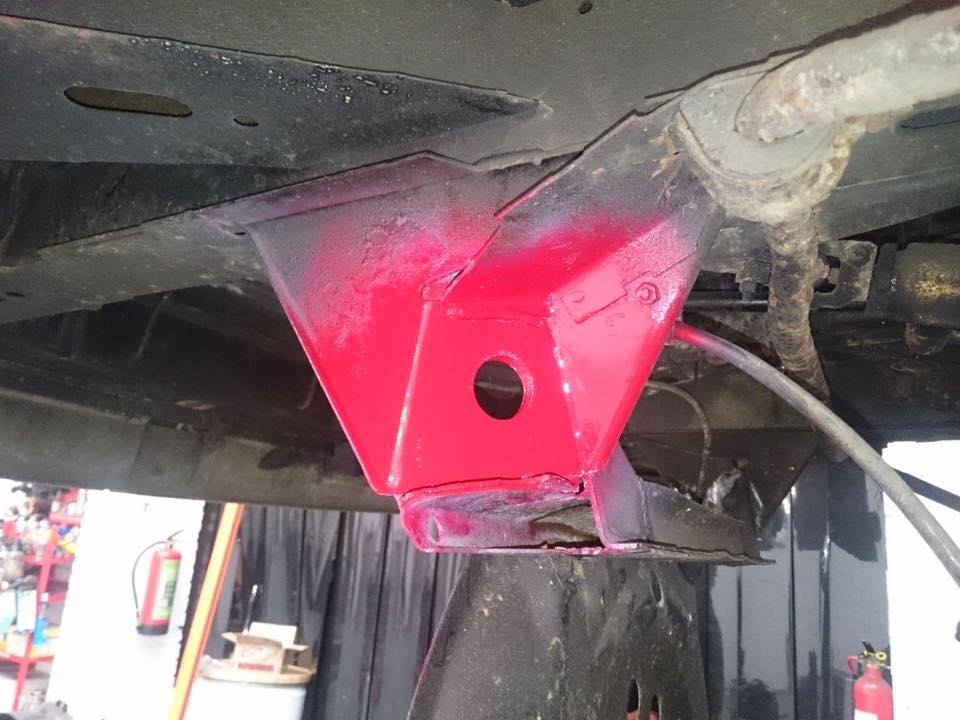
The following is pretty much a step by step pictorial of how the repair was done. I will hasten to add that there is a lot more science and expertises to this than just being able to use a welder and a grinder. If you care about your van…and more importantly the occupants, pedestrians and other road users that may become involved as a result of dodgy workmanship, i would recommend you leave this sort of fix to the experts.

So the first pictures were emailed to me by Simon at Brickwerks (above). This was great as I was left in no doubt that this really needed addressing. Shortly after followed these showing the progress:

Radius5

All corrosion cut out of the ‘three’ affected layers.

First layer of plate welded in from the back

First layer of plate welded in from the back, after which the middle and front followed.

seams ground back to clean

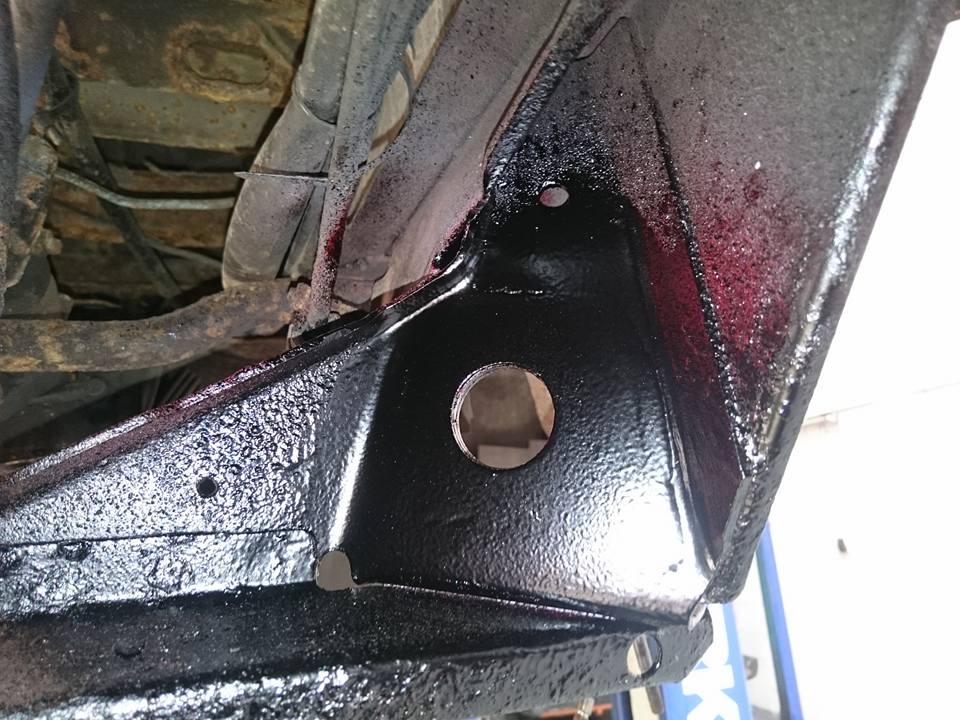
All visible surfaces were cleaned back and the hole was drilled for the radius arm. I will say that this hole was not guess work. A template was made from a new off the shelf part to make sure it was in exactly the right place.

After this that bare metal was primed

After this the bare metal was primed…

Radius3

Painted…

Radius9

and Dinitrol applied to stop stone chips & water ingress.

Radius7

I’ll just point out that the above photo shows one of the desperately thing layers of metal that made up a part of the chassis connector points. The repair (I think you will agree) is a million miles away from the old and worn out parts that were on my van when I purchased it.

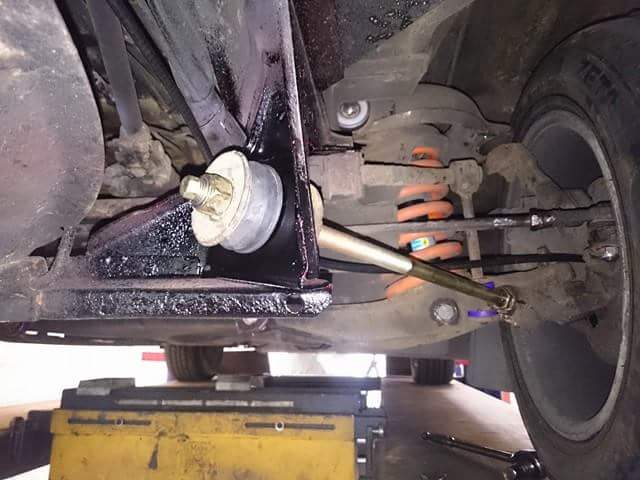
So this is the finished article….

received_10209957833088937

Note: When I first got my van I went through a process of replacing some of the suspension parts such as coil springs and dampers. This improved the ride of the van massively and I didn’t think it could get any better. I was proven wrong and it was instantly noticeable on the way back to Derby from the workshop in Yorkshire that it was so much tighter on the bends and bumps. This just goes to show that it is a sum of all of the components being in good working order that makes a van handle well.


Engine Under-Tray Tinware & Soundproofing

JX undertray
JX Under-tray

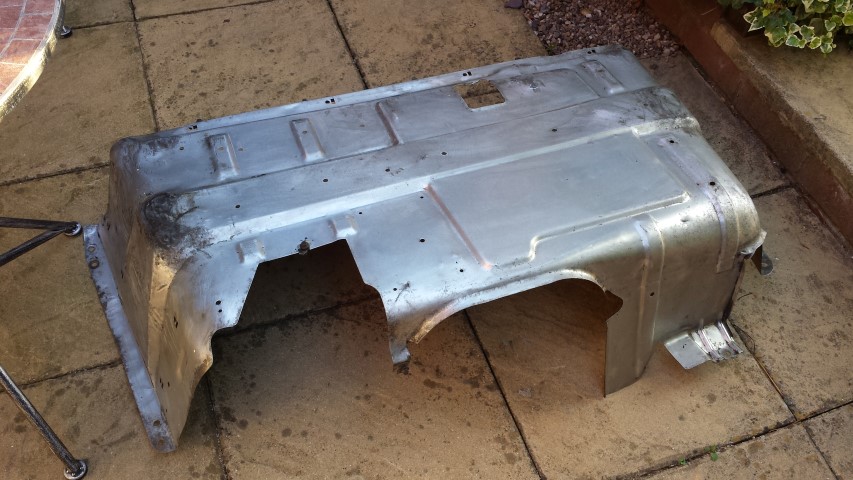
My camper never came with the under-tray components that are fitted from new. This basically consists of a large, thin pressed metal element that sits underneath the engine. It contains high density proofing that is held onto the tinware by plastic cross retainers. To complete the this there is a separate part that draws air into the turbo to keep that cool, and another piece of tinware that drops down at the back of the van to provide a fastening point for the main under-tray.

Being a newcomer to the whole T3 van scene I didn’t have the experience to know what should have been fitted to the vehicle and what shouldn’t. It was around the time i decided to change my exhaust that I realize that this part was missing. After some discussion on forums it soon became clear that the extra time for maintenance in having to remove these items, often lead to it never being put back on again.

However, after some thought i decided to track down these missing parts and fit them back on the van. My reasoning was, they were designed by VW to be fitted, so they must have had a justification for doing so. The obvious ones were to reduce noise, and cool the turbo. Stopping dirt and dust from the road filtering into the engine bay is another, and reducing  the amount of muck getting on the bottom of the engine \ sump.

I found a complete set of tinware in the UK, and had it shipped over. It total it cost me about £60 including delivery. It was covered in a thick black oily deposit. Waxoil, Dinitrol or Tetroseal?

JX-Undertray (2)
Removing the black oily covering

Anyway, I decided that it was going to be cleaned off and the whole thing would be painted in Hammerite silver. I removed the black oily covering with petrol which was really effective at breaking it down to a liquid. I then just wiped it off with a rag. I must admit, although the covering was not pleasing on the eye, i feel it must have done it’s job in preserving the tinware, Although it is galvanized, i feel it would have been in a lot worse condition if not for the gunk.

Gunk removed
Gunk removed

JX-Undertray (3)

Unfortunately , that’s about as exciting as this post gets. As you can see from the photo at the top of this post, that is the finished article. As with most of the maintenance work underneath the van, it’s always easier to get a garage to do it due to the awkward position of the items. This was fitted along with the Webasto night heater.

CasingWebastoVan

Its questionable as to weather or not this makes a great deal of difference acoustically whilst inside the van. However, It does make a difference from outside (which my neighbors will surely appreciate 🙂 ) .

LDA Boost Controller

I have owned my van for best part of eight months and had lived with it for what it was (an under powered 1990 campervan) . I had seen all the posts on various forums etc about how bad these vehicle were on hills and in general in their standard guise, and had toyed with the idea of dropping in a different engine because i didn’t think i could live with it for the long term. However, i’d almost made my mind up that i was going to live with (and love) it for what it was.

Little did i know that there was actually a problem with the LDA boost controller. This was there to increase the fuel to the engine under load, and the fact that mine was knackered was a big deal as far as performance was concerned. This was highlighted during a service at Brickwerks.

So I set to rectifying the problem. The new ones were not readily available in the UK so I bought a second hand one from North West VW at a cost of £29 delivered. Fitted it and it made a massive difference to the drive ability especially on hills. So the van doesn’t need to be upgraded engine wise! 🙂

LDABoostController

Find this interesting? Please leave a comment 🙂