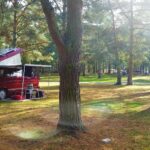
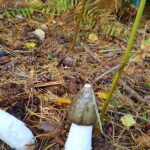
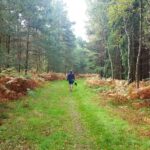
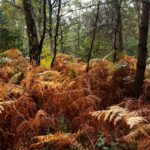
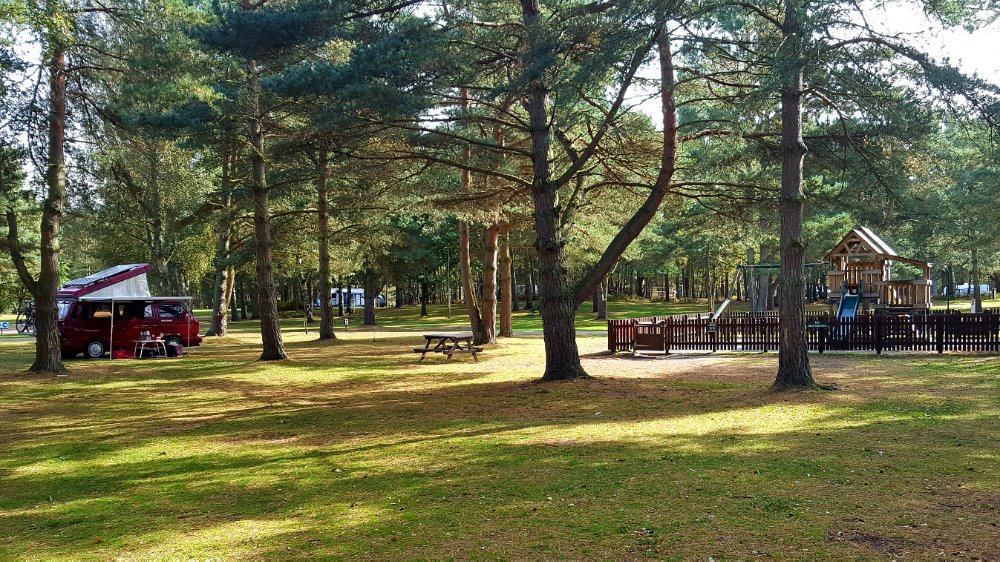
A Friday off over the easter half term was only ever going to me made more enjoyable by the presence of Brooke and an overnight camp at Clumber Park. 🙂


https://www.nationaltrust.org.uk/visit/nottinghamshire-lincolnshire/clumber-park

A Friday off over the easter half term was only ever going to me made more enjoyable by the presence of Brooke and an overnight camp at Clumber Park. 🙂
https://www.nationaltrust.org.uk/visit/nottinghamshire-lincolnshire/clumber-park
This weekend for Mandy and myself happens to be a long one with us both having the Friday off work. As our month long trip to Croatia looms ever closer the pressures to organise the locations / campsites increases. For months we have been consistent in our promise to organise the trip as each weekend passes, we have also been equally consistent at not doing so, due to the distractions of home life.
So our main aim of this micro stop over at a local campsite was to do as little as possible other than get us into camping mode, and plan our holiday.

We have broke the camels back in as much as we have booked our ferry crossings and two nights in Bruges to start the vacation. We also have our eyes on two very nice campsites on the shore of the aptly named Wolfgangsee Lake, and have earmarked some really nice campsites but on the coast of Croatia.
So this single nights stay has been a success. We are a little more relaxed (which is always the case after staying in idyllic surroundings in the van), and looking forward to our main 2019 holiday with enthusiasm, instead of trepidation.
The campsite we chose for this single night stop over was just about as local as it gets. Ashbourne is about 30 minutes from our home which was ideal to maximise our stay and limit fuel. I have stayed here in the past for a couple of nights on my own when recovering from a shoulder injury. It’s surrounded by pine tree and has a cosey feel to each pitch. It’s well maintained with excellent toilet & shower facilities.
http://www.woodlandcaravanpark.co.uk
I had noticed that the power reel supplying my Twizy with electricity had begun to trip on an ever increasing basis. Along with this the plug was getting pretty warm as it charged the car. I thought that this must have been normal as I had no previous benchmark to draw an alternative conclusion against. Little did I know that things were only ever going to get worse.
I attempted to charge the Twizy one evening, but came out later that night to find that the reel had tripped again. So I reset it and got up the following morning to find it had only put a small amount of juice into the battery until it tripped again. So I reset yet again, had my breakfast and popped out to the garage just before I went to work. Fortunately I did as the plug had started to melt which had also damaged the power reel.


I counted myself very lucky especially as the reel was resting on a carpet in the garage. For whatever reason the fuse didn’t blow, but on inspection there was a lot of carbonised deposits showing that there must have been a lot of arcing inside. I showed the plug to an electrician who said straight away that the damage was caused by a loose connection inside plug.
I decided to take no chances in the future. No more plugging the car into a multi socket extension. It was going to have its own dedicated lead so I set to ordering all of the components to make up a charge lead . I changed the plug on the car for a new one and ran the new lead from one of the two double sockets in the garage. This was left hanging from the garage roof for easy connection to the car to limit stretch on the Trizy coiled cable.

I posted the photo above on the Twizy facebook page and a chap said he had done a similar thing, but also could monitor the power consumption and activate / deactivate the plug remotely via something called a Fritzbox router.
https://en.avm.de/products/fritzbox/
This looked really interesting but I found that it was only compatible in Europe. However, It didn’t take long to realise that there was a solution for me that would work the same at a fraction of the price. The smart home was always something that I never really wanted to get into, but my research has made me realise that home automation is getting cheaper and cheaper. I’ll cut to the chase as I could start going off on a tangent..
What I ended up buying was a ‘Smart Plug’. This can be controlled via a smart phone via a wifi connection. Very simple setup and the particular model I brought could also monitor power usage
https://www.amazon.co.uk/dp/B07D7BH6N8/ref=pe_3187911_189395841_TE_dp_1

So after watching some youtube footage I thought this looked like it ticked the box. I wasn’t confident at first as this plug would be required to be connected to my wifi network, but this was unfounded. The only issue is that the plug does catch on a regular plugs on / off switch which I thought was a bit of a negative from Teckin. For my case it was fine as it would be sandwiched between the new extension outlet, and the Twizy plug.

Once the smart plug was connected to my wifi network following the guide, I could make the socket live whenever I wanted, monitor the power consumption, set a timer so that it would turn off after a period of time or just turn it off all via my smart phone.


This solution works perfectly for the Twizy.
The wheels make a difference on any vehicle and is usually one of the easiest (if not always the cheapest) modification to make. Go on any online portal such as eBay, Demon Tweeks, Google, etc, etc to find a whole raft of possible wheels that will fit the stud pattern of the particular car manufacturer you own. Well you may not be surprised that the Renault Twizy is different. There is quite probably a very good reason for having only 3 studs holding the wheel on, but i can’t really think of one other than it saves the weight of one nut, thus reducing the kinetic energy required for the low powered EV to move and stop along with the cost of one whole stud!
Anyways, I totally get the physics of narrower wheels mean less contact thus reducing friction / drag and as a result increase the range the battery can propel the car. However the Twizy wheels are ridiculously narrow, and this I feel is the one reason that it gets a bad perception from people that can’t handle concepts that fall beyond the norm. For sure there are people that look, stare and point because they think it looks cool in its standard guise, but for all those that stand on the side of the fence that are not quite sure about the Twizy, the wide wheels will be the deciding factor.
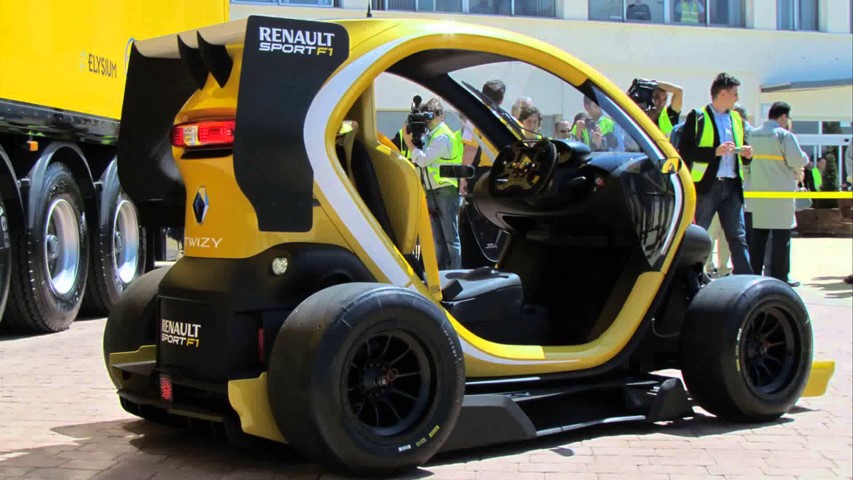
So my decision was made that by hook or by crook I was going to put the Burrows touch on the EV. The F1 twizy was inspiration in part, but I had seen other people in the very limited Twizy circle had done some modifications with the wheels. However, the only real route I could go down due to the unique stud pattern was to take the standard steel wheel and have it banded. It’s a process where one side of the rim is cut from the other, they are moved apart the required distance, and a band of metal is welded back in to increase the width. This all sounds very dodgy, but its legal and surprisingly safe.
So i found a chap on a forum that was willing to sell me his old wheels due to the fact he had replaced them with the Twizy stock alloy (equally as narrow as the steel). I sent him the funds and asked him to send the wheels to the banding fabrication company. I liaised with the fabricators (ALONZE CUSTOM FABRICATION –
http://www.alonzecustom.co.uk/steel-wheel-banding.php ) about the width of the band i wanted inserting, and within two weeks I had a re-worked set of wheels
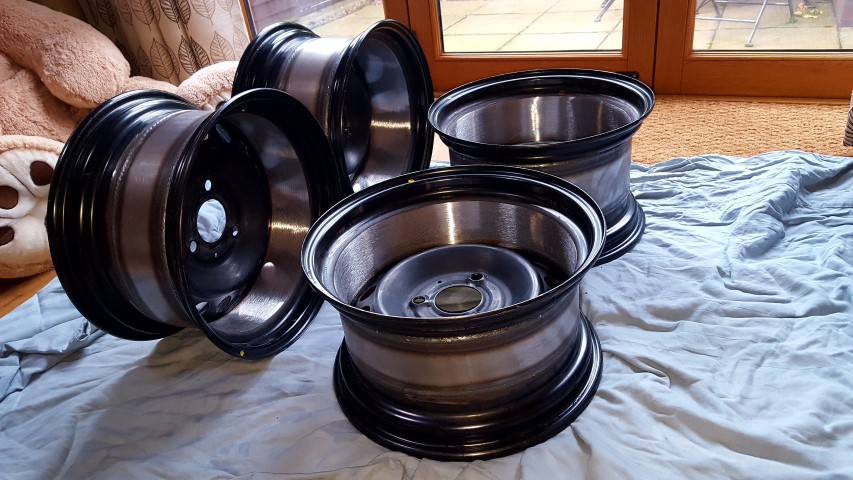
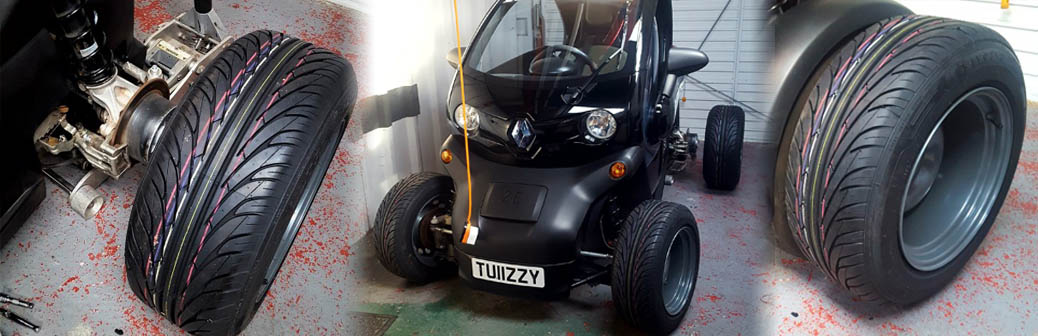
The decision was that the rears were going to be different widths. 8 inches at the rear, and 7 front and I was really happy with them when they were returned from the fabricators. The next stage was to have them powder coated. As can be seen by the photo above, there was plenty of bare metal that would would start to oxidise and rust if it got damp, so I made every effort to keep them in a dry environment until they were painted. I decided on a mid grey for the colour. The reason being I didn’t want silver as it was pretty common, I didn’t want black or the similar anthracite as I felt the wheel rim needed to be a different colour to the tyre to separate them.
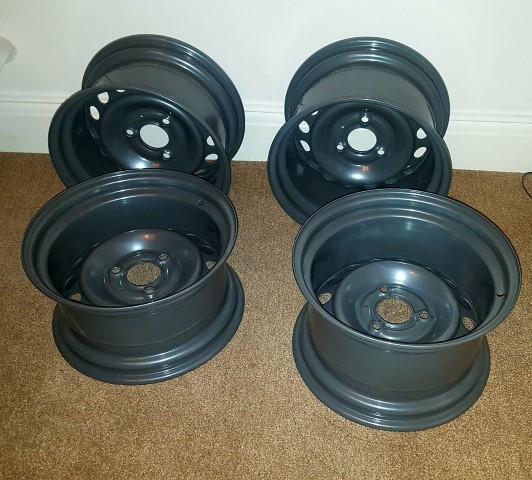
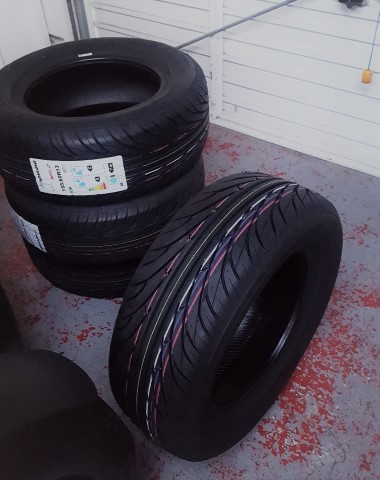
As you can imagine making a bespoke set of wheels leads you into the territory where you need to get a set of tyres that compliments the wheels and the vehicle they are going to go on. The wrong tyre will have a negative effect on the motors power to get vehicle up to speed, and also an incorrect reading on the speedometer. All of this taken into account I could only source one tyre that would fit both pairs of rims with a rolling radius that would keep the Twizy operating as it should. These were the
Rear: Nankang Ultra Sport NS-2 195/60 R13
Front: Nankang Ultra Sport NS-2 175/60 R13
The cheapest website i could find for the above was 123Tyres at £168 for the full set
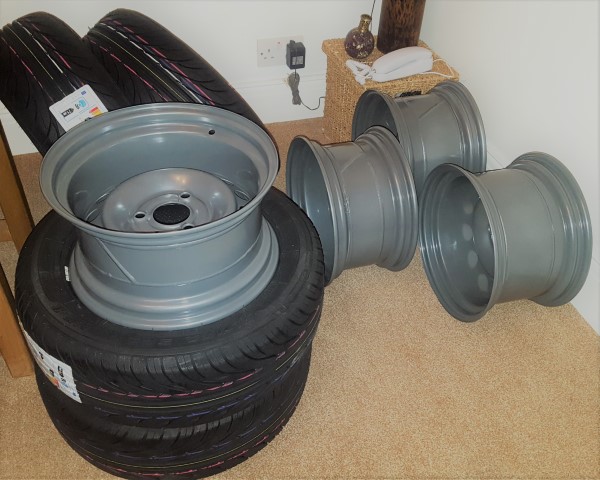
After a trip to the local tyre garage the rubber was fitted to the rims. I got the impression it was a little more protracted than usual due to the slightly stretched profile of the tyre on the wheel, but the overall package turned out to be really pleasing .
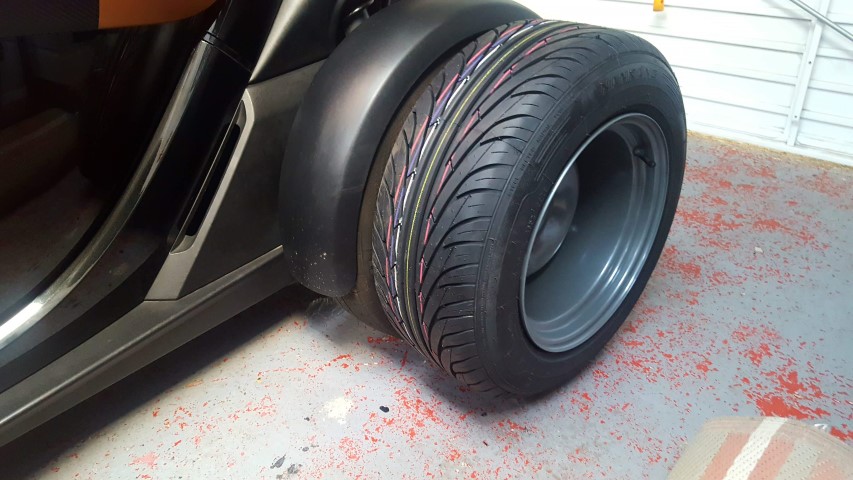
I was a little concerned that the rim would protrude the rubber with the width I had chosen, but its not. Which is good as far as dinging the rim. I have seen many VW golfs etc with massively over sized wheels and tyres that are stretch ludicrously.
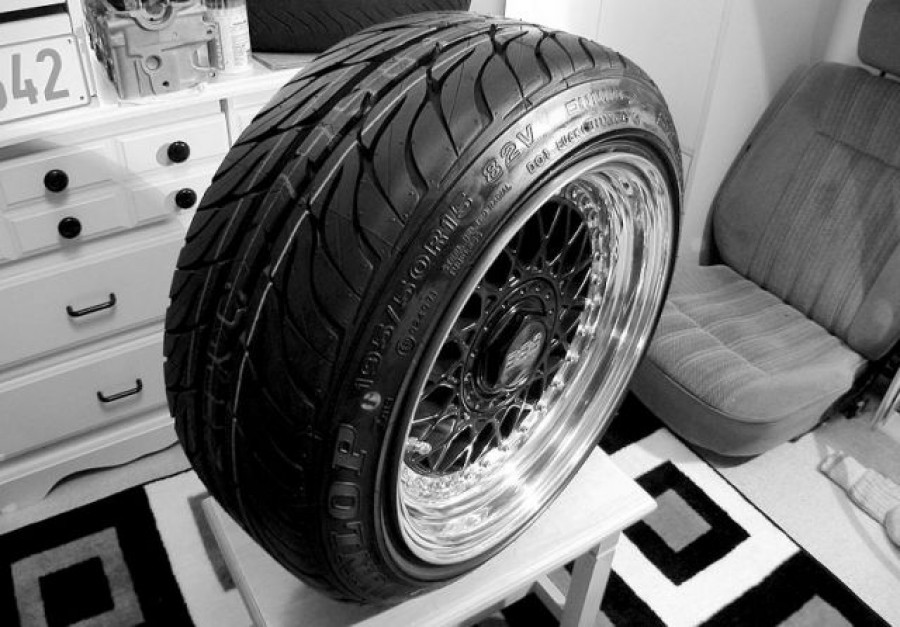
So the next thing was to fit the wheels. I was going to hold off this process due to the fact the mudguards / fenders would need to be removed to accommodate the wheels, which would effectively render the car undrivable during wet weather. However, the temptation got the better of me and I decided to make the change despite this. I’m sure I will regret this in the not too distant future, but at least it will encourage me to get a solution sorted sooner rather than later for a mudguard.
Before I fitted the wheels I couldn’t help but spend a little time cleaning up the running gear and brakes. The front calipers were removed and painted. After a good wire brush down I painted them red. I always find that two coats of hammerite is enough to eat into any corrosion and provide lasting protection for every vehicle i have renovated in the past. This would be no different.
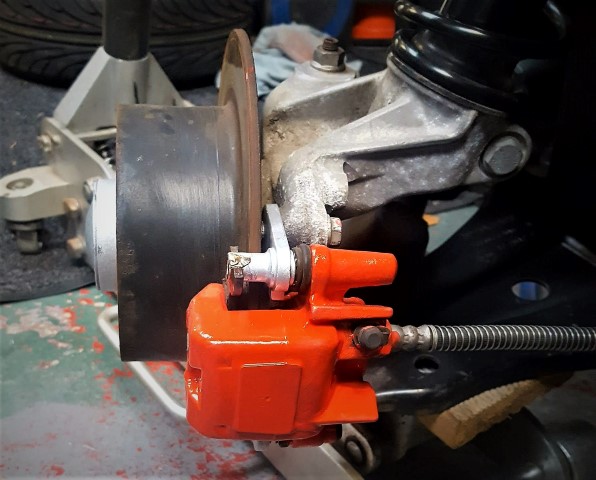
The same was done for the rear, although i decided against painting the calipers as they were in remarkably good condition. I still greased up the handbrake cable and added a small amount of hammerite silver to any rust visible.
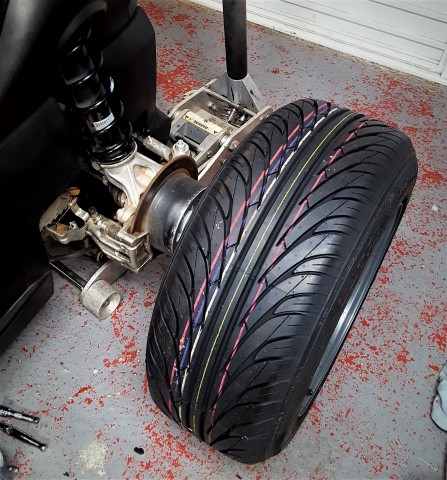
As you can see from the image below, its transformed the stature of the vehicle and its stance is much more aggressive. The one thing that lets the Twizy down and turns peoples inquisitivity to err on the side of dislike rather than like, is the puny wheels giving it more of a mobility scooter look than fully fledged road going vehicle.

I will say at this point that I am under no illusion that this modification will have a big impact on performance and range. From a performance point of view I have a solution. I will be fitting a device called a PowerBox (More on this in a future post). This will plug into the ODBC port and will override the Renault restrictions in terms of the power output and speed, effectively doubling the performance. There will be a range reduction but that’s something I am going to have to accept.
This vehicle for me is for primarily for excitement, as has been all of my previous vehicle. It’s a bit odd, but I hope that this will prove there is a new generation of vehicles that can put a smile on peoples faces, much like the Vespa, Lambretta and bubble cars did all those years ago.

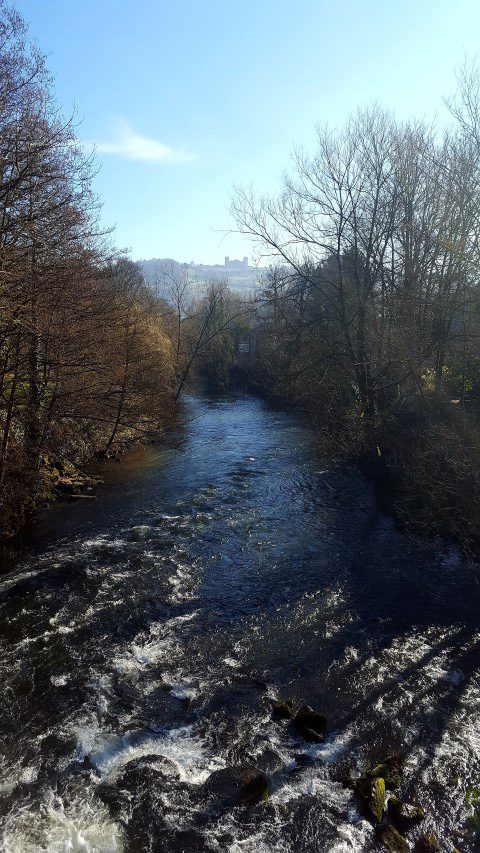
The weather has been pretty bonkers for a February. It’s at the same time last year we were exposed to the Beast From the East, and now were hitting 21 degrees which is a record. It’s still officially winter, at least for the next month! The low sun casts long shadows, but it’s surprisingly easy to find the rays of sunshine, and when you do its positively warm. Mandy had some holidays to use up as we approach the end of the financial year, so dotted a day here and there to make sure she didn’t lose them and I found myself with a flexible day off also.
The forecast was good for the foreseeable meteorological week, so we agreed to get the van out and book into a local campsite we had stayed at back in 2015. We knew the views were nice, and we could only commit to one nights stay so we couldn’t consider going too far afield. So i collected the van on Saturday and gave it a good wash. Preparation was pretty minimal and we just had to consider a days worth of food.
So sunday morning we set off for Matlock Bath and managed to get a parking spot on the main road before the bikes engulfed them.
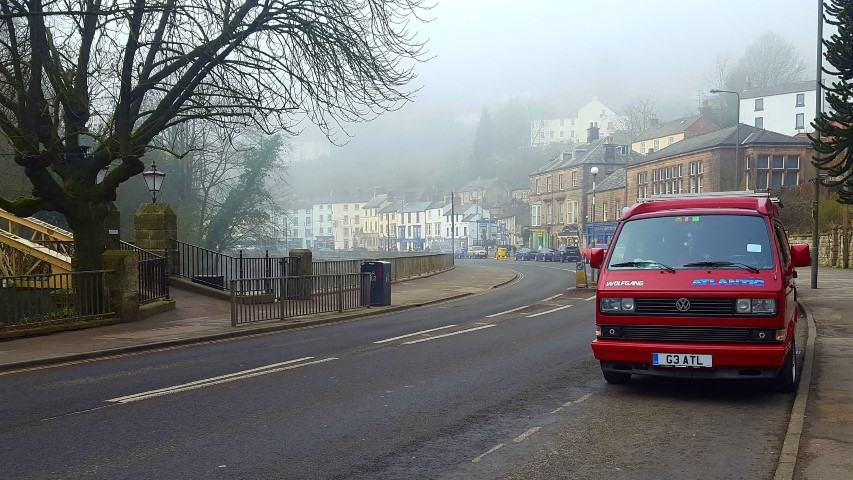
We were just killing time as we couldn’t get on the campsite until post 12pm. So we found a cozy little coffee shop to chill in until we had reach the 1 hour parking limit imposed on the main road. It was always nice to spend time in Matlock Bath, but even in the midst of summer there is always shade, and the winter’s must seem really long in the valley to anybody that lived there.
So coffee drunk we got in the van and drove through Matlock and up the steep hill towards Tax Farm. We were still far to early to check in to the campsite so found a secluded spot to pull into and read for a while. The odd car passed and a few cyclists, but other than that it was really peaceful. As it approached 1pm we headed towards the campsite and drove down the steep incline onto the lower teer.
The afternoon was spent enjoying the views, reading and listening to the radio and eventually settled down in bed to an hour or two of Netflix.

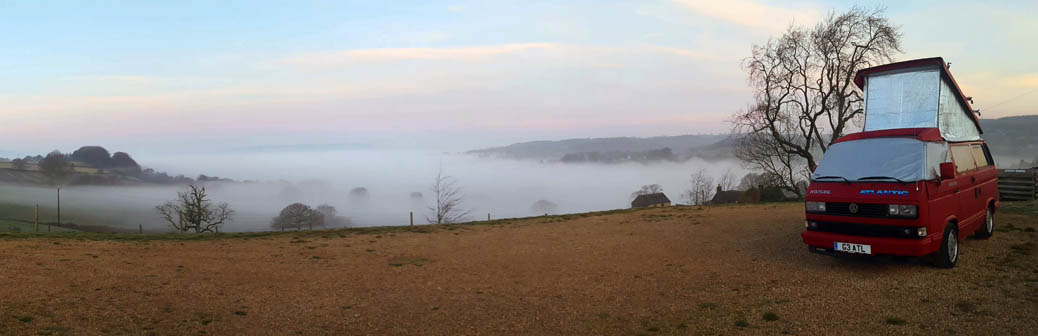
The clear night meant we awoke to a frost, but as a result there was an amazing sunrise with mist filled valley towards the Two Dales / Darley Dale. This was enjoyed over coffee and breakfast with the night heater whirring away to keep us warm. The morning followed a similar pattern to the previous afternoon, but we had to vacate the pitch before 12pm. So as late morning approached we dropped the roof and prepared the van for the road. Matlock was only a mile down the road and as the sun was still very much in play, we decided to spend a couple of hours in the town before heading home.
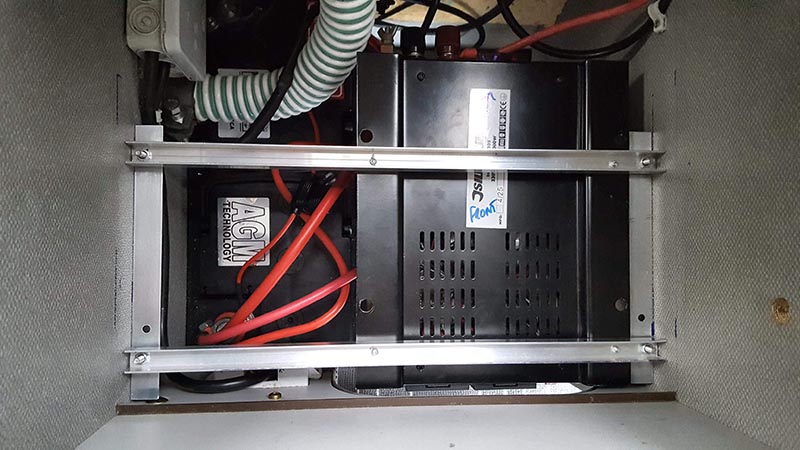
Since upgrading my solar installation in the summer of 2017 the inverter had been omitted due to time constraints \ other priorities. It was always going to go back in as this is the missing component to a fully off grid solution, providing a means of converting the leisure battery’s DC power to AC via a three pin (UK) socket. Obvious uses are for laptop charging or Mandy’s hair drier, so brownie points are gained for making the effort to fit.
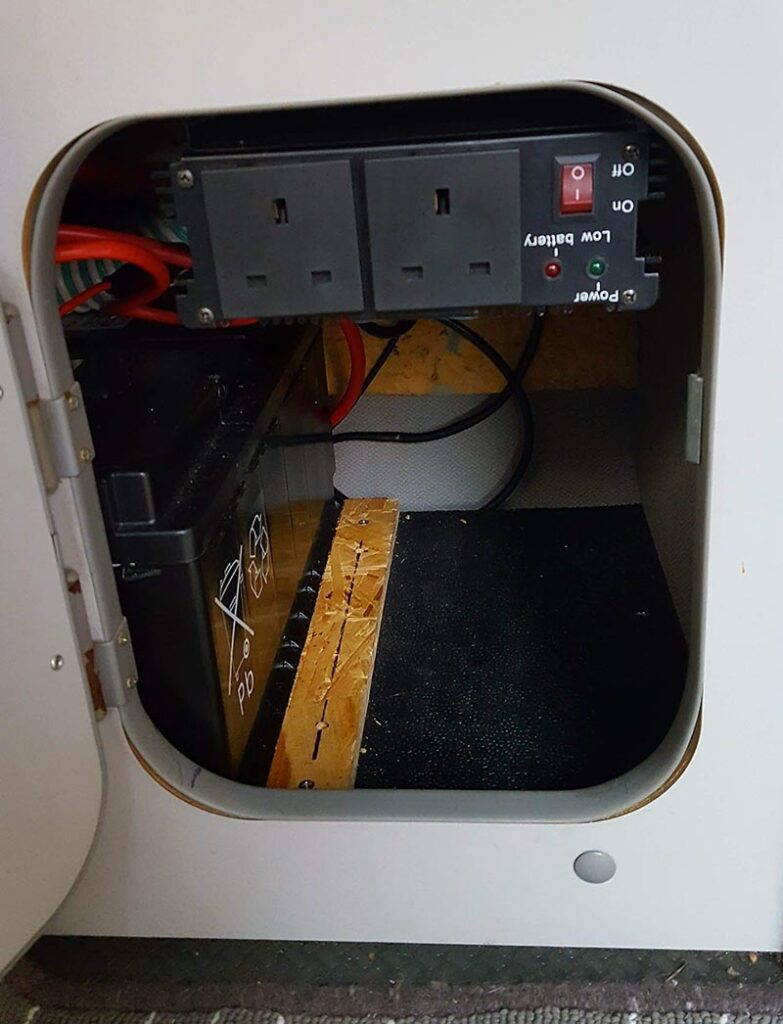
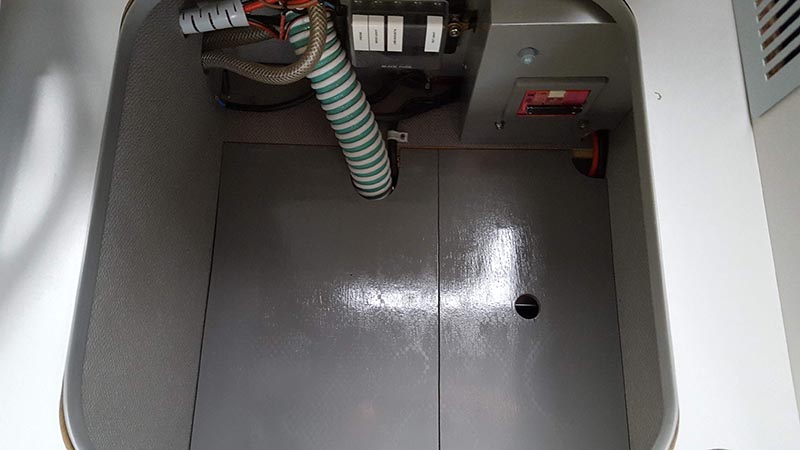
After deciding on a position for my batteries during the solar install, it pretty much meant that the inverter had to go in the same location. Its all very snug, and will be even more so when I get the second leisure battery in place. I’m pretty pleased that I have managed to get so much equipment in such a confined space. We have lost a cupboard, but it’s much neater in this configuration.
Anybody that really knows me will know that I don’t do standard! If you look back at my past vehicles they have all had modifications. In fact it’s pretty easy to modify a car, motorbike, scooter or campervan with off the shelf items, and this had been the case for most of my previous vehicles purely because it was so easy if you could afford the parts. Owning my campervan has lead me to be a little more creative with items like the bespoke slide out drawer, chopping board and installation of the campervans off grid solar supply. So I guess my creativity and willingness to learn new practical skills has put me in a situation where I feel i have the confidence to tackle things where some may not!?
If your reading this you either have a campervan, or a Twizy. If neither I would wonder how you found this page, but Twizy owners are most likely to have an interest in this for obvious reasons.
I will just add that this is an entirely bespoke modification. I have not kept any of the templates, measurements or little to help anybody build this with any degree of accuracy from this guide. It’s not that i deliberately want to be obstructive or unhelpful, It’s just that it’s all been put together on the fly, hoping and praying things fall into place without having to start again from scratch. So I apologise in advance for not being able to send out CAD files, or a detailed DIY guide for what you are about to see. (Also, at time of publish this is not a finished modification and very much work in progress!)
You can see from my initial Twizy post my reason for wanting such a vehicle. So hopefully that will give you some background. That said, I love the look of the F1 Twizy, and although it is a little extreme with the front spoiler, I felt that a rear Wing and side Foils would give my take a more balanced look once I have completed some of the other Modifications.
After consulting numerous images of different angles of the F1 Twizy I started to softly commit to the prospect of a rear wing by masking out an area that could offer a mounting point for the main fixing bracket. This was always going to be convoluted slightly by the curve of the bodywork. So I added a flat in the form of a piece of corrugated cardboard.
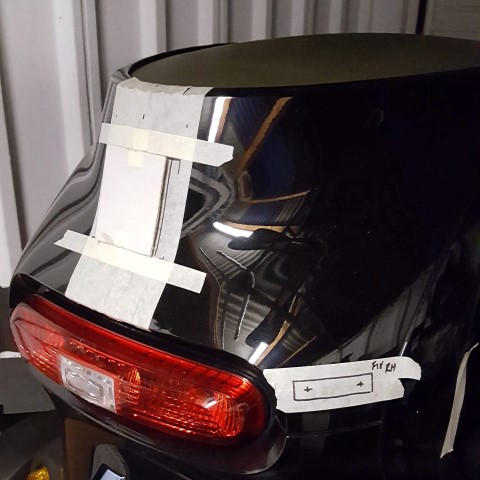
It was from this that I created a side on template to get the profile i needed to elevate the wing slightly. I don’t have the cardboard template unfortunately , but the following two images show the aluminum profile created, and the highlighted profile used for the production
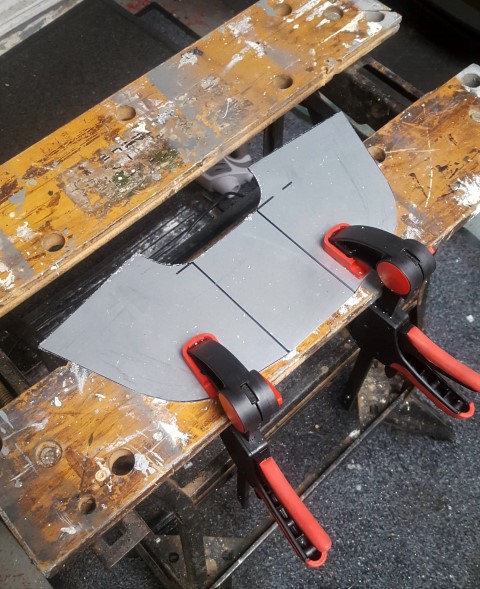

With the aluminum cut, this was folded in the marked lines to form the basic shape of the main bracket. To further increase the structure I used 3mm hardwood ply. The template was used to cut four corresponding elements that would sit either side of the two main supports.
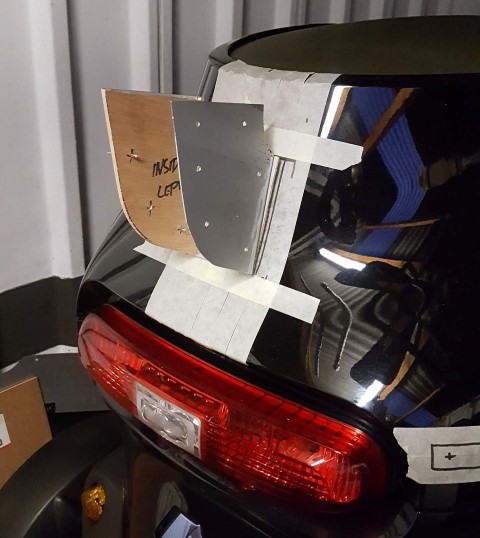

All of these components were carefully profiled, mated up and drilled to provide fixings using a pot rivet gun. The laminated ply was further countersunk to ensure the rivets didn’t protrude above the facings. This clip shows everything mated up prior to the rivets being fixed.
The initial location mock up used a corrugated cardboard flat to emulate the bracket surface. With the profile of the rear being curved I would need to create a leveling base plate so the new bracket would mate correctly. To do this i masked off the rear of the car with tape. After this I sprayed adhesive and applied baking foil so the resin couldn’t adhere once complete. From here i cut fiberglass strips in varying thicknesses to create a flat pad.

The plywood components were gel coated on the inside with fiberglass resin, and rivet gunned together. Once dry they were gel coated in fiberglass epoxy, then covered in fiberglass. The main bracket can be seen being mathed up to the leveling pad.

The finish on the bracket would never be production quality without any intervention, so it would need to be filled and prepared if it was to look anything like acceptable. Here you can see it with the newly created leveling pad after some body filler.

Here you can see some progress in terms of the sanding and flatting of the main bracket, along with some matching up of the leveling plate.

Basic matching up after the bracket and leveling pad have been bonded together using epoxy
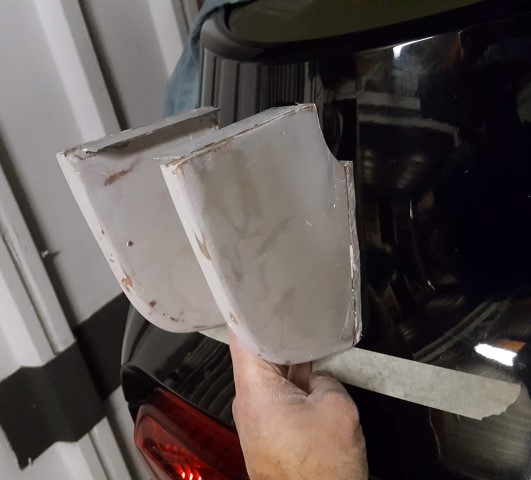
To create a broad area for the main aerofoil / wing, i felt it would be better to fix this to a plate rather than the actual bracket. I had decided that the main wing fixing plate would be riveted and bonded using metal epoxy as a belt and braces approach, so below you can see the wing fixing being matched and drilled.
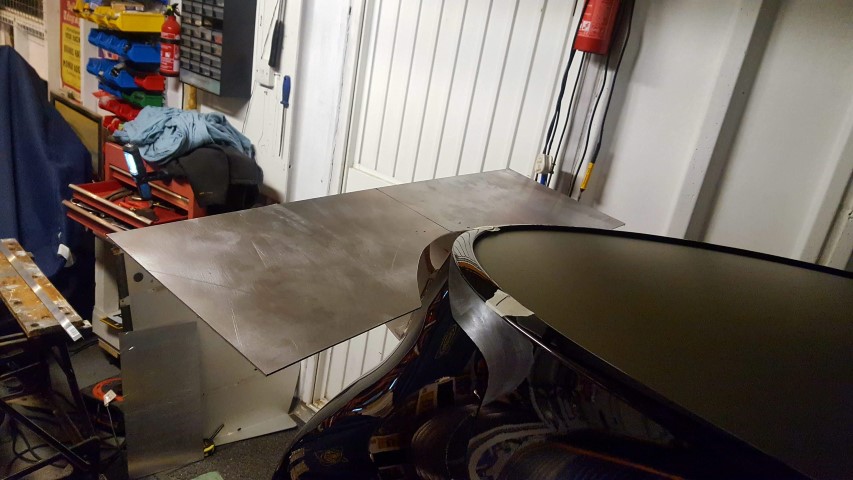
Once I had the main bracket available I used a variety of different materials to establish the upper profile of the Twizy. From there i used a plywood template to gain the profile I needed to map onto the 3mm aluminum sheet i felt was appropriate for the wing.

Template used to cut the 3mm aluminum.
This modification was always going to require drilling holes into the bodywork to mount the wing bracket and tower foil elements. I wasn’t 100% comfortable doing this to the existing bodywork so I sources a second hand set from Montenegro. Bit of a strange location to get the parts from I hear you say. I posted a wanted advert on the Renault Twizy Facebook group and the parts were offered up by a chap that was breaking one. Although I was a little apprehensive at first, the more I chatted to the person via messaging, the more convinced I was that the goods would come through. That said I wasn’t fully convinced that they would arrive in one piece, but they did so happy days. The bonus was they were already black.
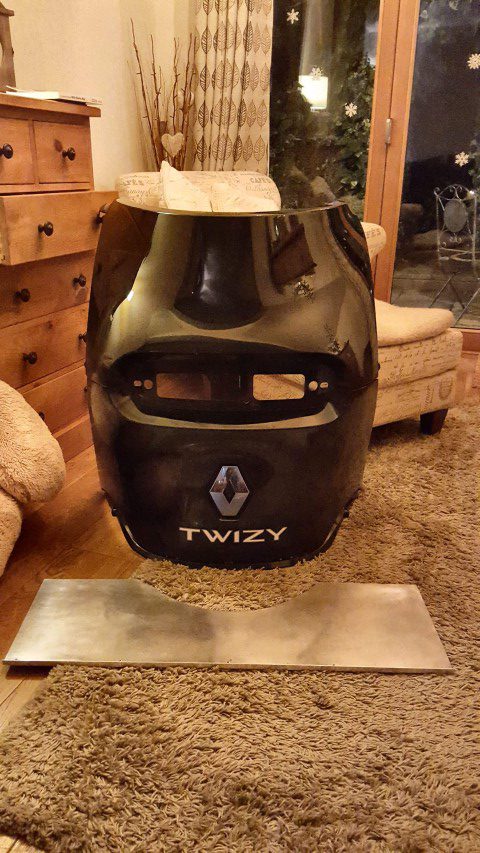
These two pieces of bodywork are plastic and very flexible. I didn’t want to be working on the Twizy as it would mean I couldn’t use it diring the fabrication. So I decided to make a jig in the form of a wooden structure to mount the upper bodywork to. The added bonus was that I could position the part at a more comfortable level on my Black & Decker workmate whilst the work was carried out .
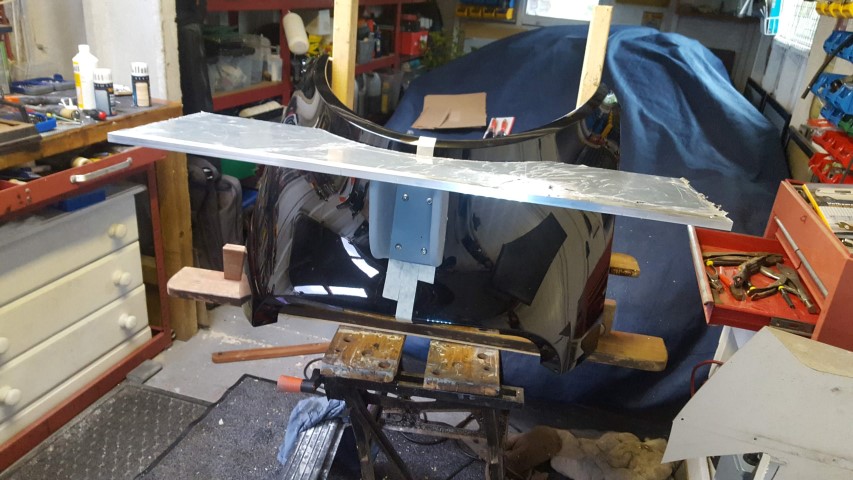
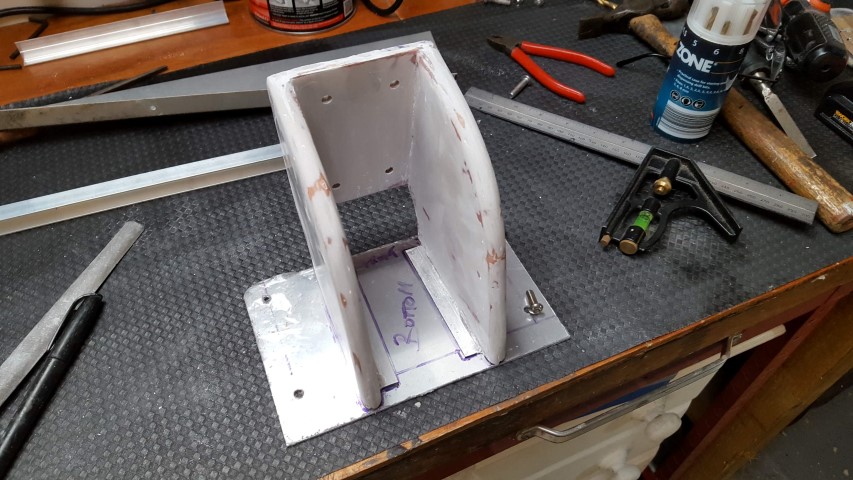
The image below is jumping forward a little more than I would like for all the reasons I explained in the initial paragraphs. But here you see the main bracket (1), the wing (2) cut from ply template, the wing fixing plate (3), the bodywork leveling pad (4) and the side foil fixings (5)

As can be seen in the above image, reference 5 is for the fixings to the side elements / wings. These are basically 90 degree aluminum angle brackets, cut, drilled, epoxy glued and riveted to the main wing (seen below)
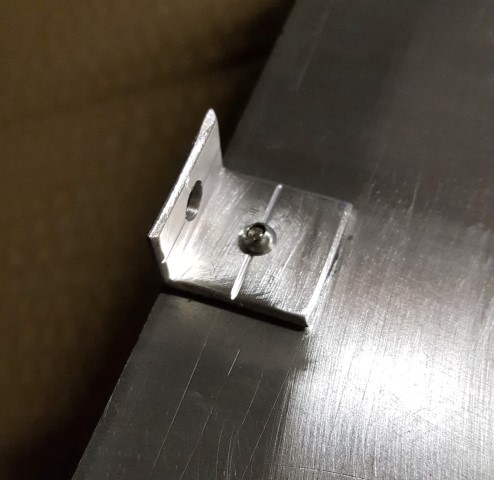
Below shows progress with components aluminum elements etch primed, them primed before paint.
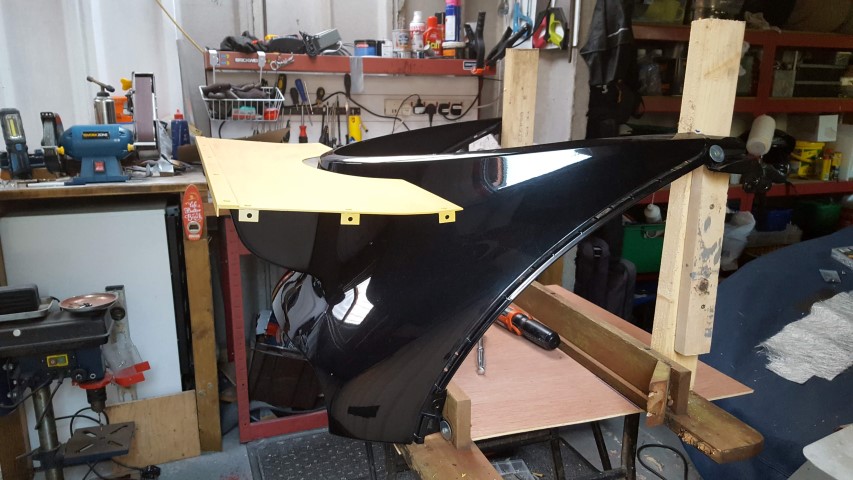
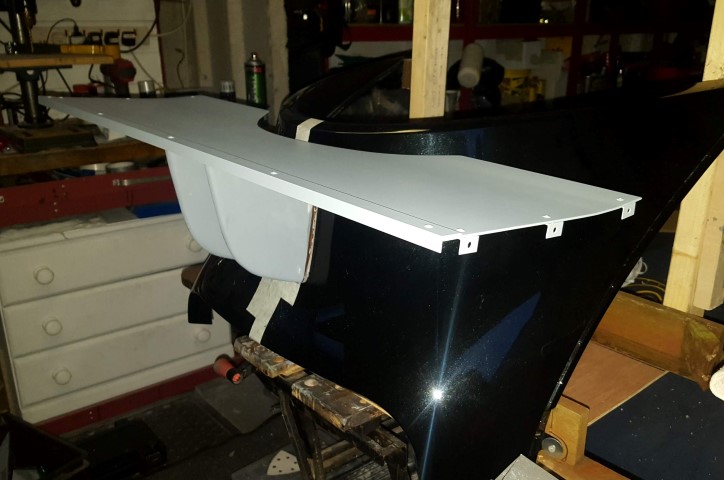
Both main parts at this point have been painted satin black, and the main wing has had a carbon wrap.
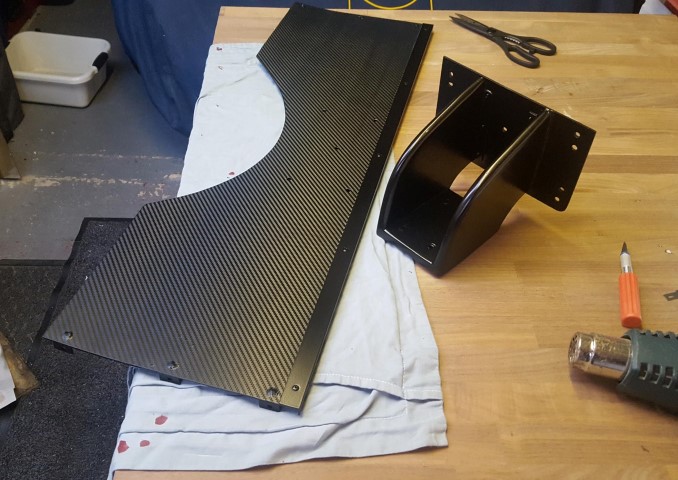
I had ordered some graphics for all of the parts I was working on, so the main wing was liveried up and mounted to the bodywork
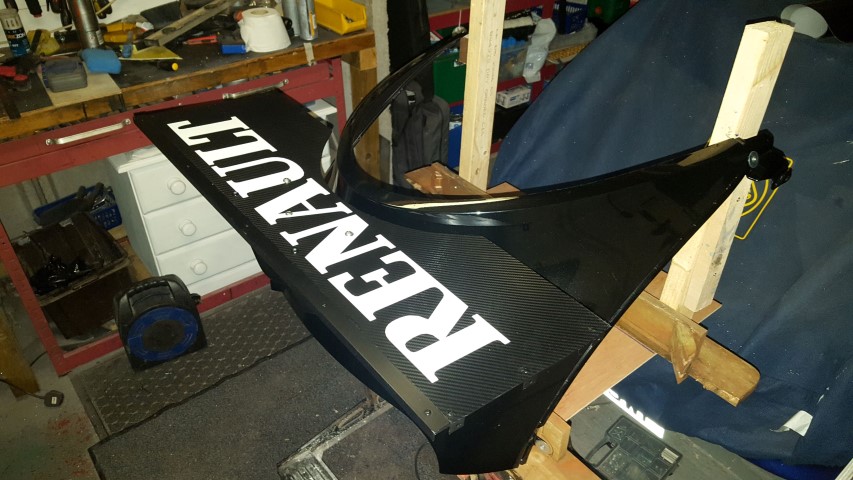
I decided that the most cost effective way to make the side elements would be to use 3mm fibreglass sheet. Other options included carbon fibre, but this would have been ludicrously expensive, and I really couldn’t justify spending upwards of £200. The largest size of fibreglass i could source was A3 (329mm x 483mm). This would have been too small if I had wanted to try and closely replicate the F1 Twizy spoiler, but I had to be realistic regarding the material I was working with. Any larger and the strength, stiffness and weight of the fiberglass would start to become an issue. So it really was a compromise. Having said that, I feel the proportions I commited to will be more acceptable as a day to day vehicle.
The fiberglass sheets were ordered in November (2018) but because of an issue with my delivery address it didn’t actually arrive until mid December at which point I had a bad chest infection that put me out of action, so little progress happened. Once I started to feel batter i was back in the garage measuring up the glass sheets and deciding on a shape. Once I was happy the sheets were taped together and the profile was cut using a diamond cutting wheel on a dremel. From there the position of the 3 holes on both side elements were marked and drilled.
At this point i decided that it would be better to move the bodywork onto the car so I could check and refine anything that wasn’t quite sitting level or at right angles. The side foils were attached and at this point I had to start thinking about how I was going to tie it all in and secure it at the lower part of the bodywork.
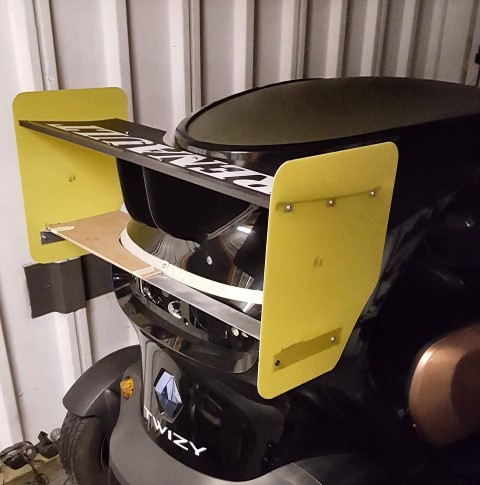
TO BE CONTINUED
Why go to Bristol again I hear you say when we have been there four times already? Explanation is fairly simple. The first time we did a Park and Ride for a day, and it wasn’t until we realised on the way back to the van on the bus that we had missed the best parts of Bristol. No such excuses for the second, third or fourth time, but it’s just about as good as a winter vacation in a campervan gets location wise!
The first week of 2018 we spent at York, Rowntree, Caravan Club site mainly because we had stayed at Baltic Wharf in 2017 and the year before in 2016 . However, after making an early booking at Edinburgh Caravan Club site, we decided that Bristol would be a much more local venue giving us the flexibility we needed if the weather took a turn for the worst.
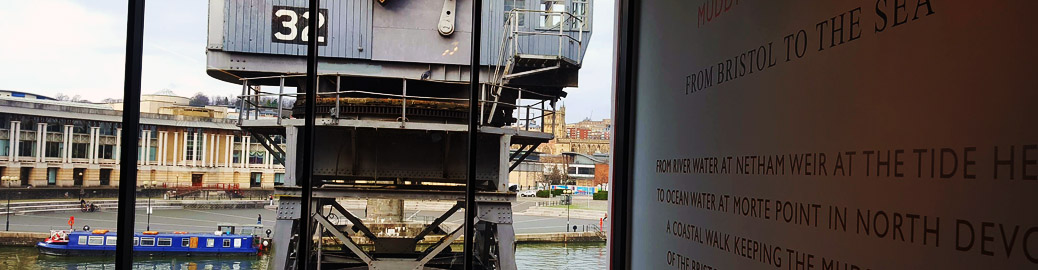
Anyway, we were not disappointed. We chose to take in lots of free attractions right on our doorstep such as the M-Shed museum, and although the week long break started unseasonably mild (shorts and T-Shirt), the temperatures soon dropped to sub zero towards the end of our stay. That said, the Webasto night heater kept us warm so the stay was a great start to 2019!


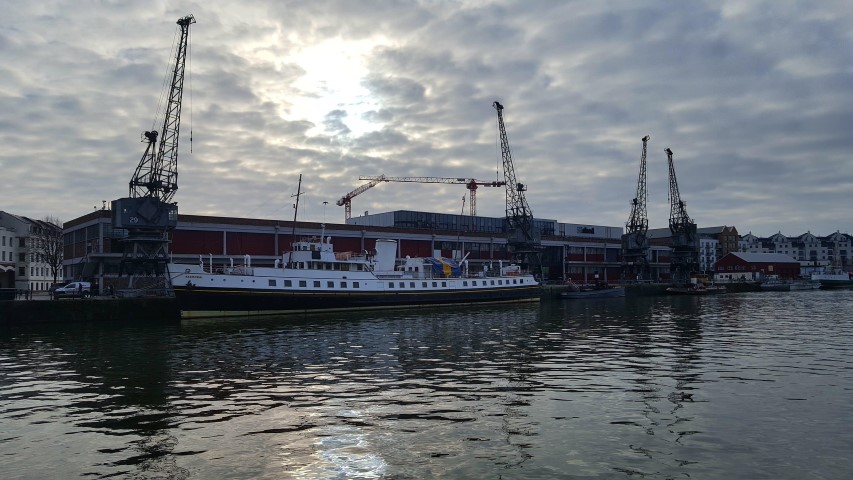

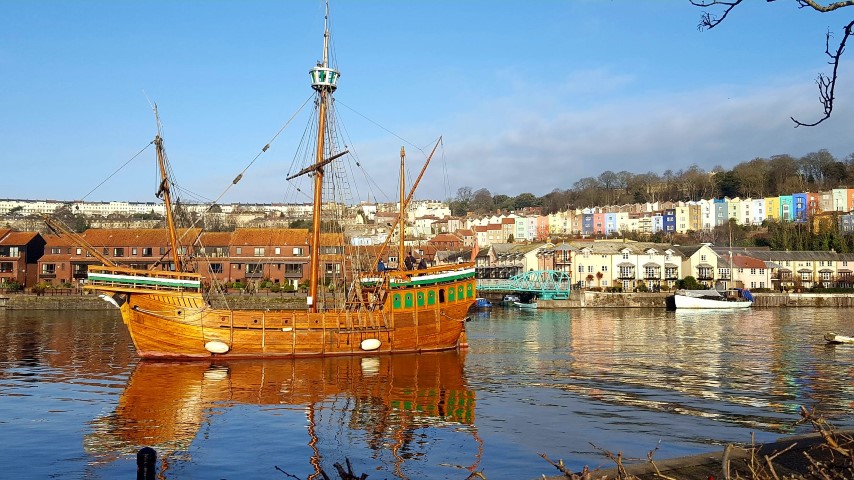


Baltic Wharf Link is below for anybody that wants to stay at this location. You must me a member of the Caravan and Motorhome Club site.
Since owning my campervan, most of my time and money had been spent renovating it. There were a few sacrifices I had to make like the sale of a couple of scooters i was rather attached to, to fund some of the major work like the engine and gearbox. Although the camper has provided an amazing distraction from these losses, it was only going to be a matter of time before I needed something to fill the impractical vehicle gap. You know, the type that puts a smile on your face.
I think the catalyst for my interest for renewable energy has come from the solar installation on my camper. Its proved amazingly effective at giving us free energy for the fridge, lighting, and all of our electronic devices as we live and travel. The only exception has been heating whilst static, which is taken care of by the diesel night heater. This, as you can imagine has allowed us to camp in remote locations without electric hook up, or choose a camping pitch that costs less money due to the fact we don’t need electricity.
I think the real buzz factor that goes with having energy for nothing can only really be appreciated by like minded people. That said I know this post will not resonate with everybody, but the world of renewable energy will ultimately make everybody’s life a whole lot better once established on mass. If anybody is really interested the best place to delve in is the youtube ‘Fully Charged‘ channel offers a wealth of information about all things green.
All of that said, it will not be of any great surprise to hear that my most recent purchase scratches the “impractical” smile on your face method of transport along with the “green energy” check box. I first saw the car advertised online during my September campervan holiday. The price was good and I was convinced this Renault Twizy was the one for me!
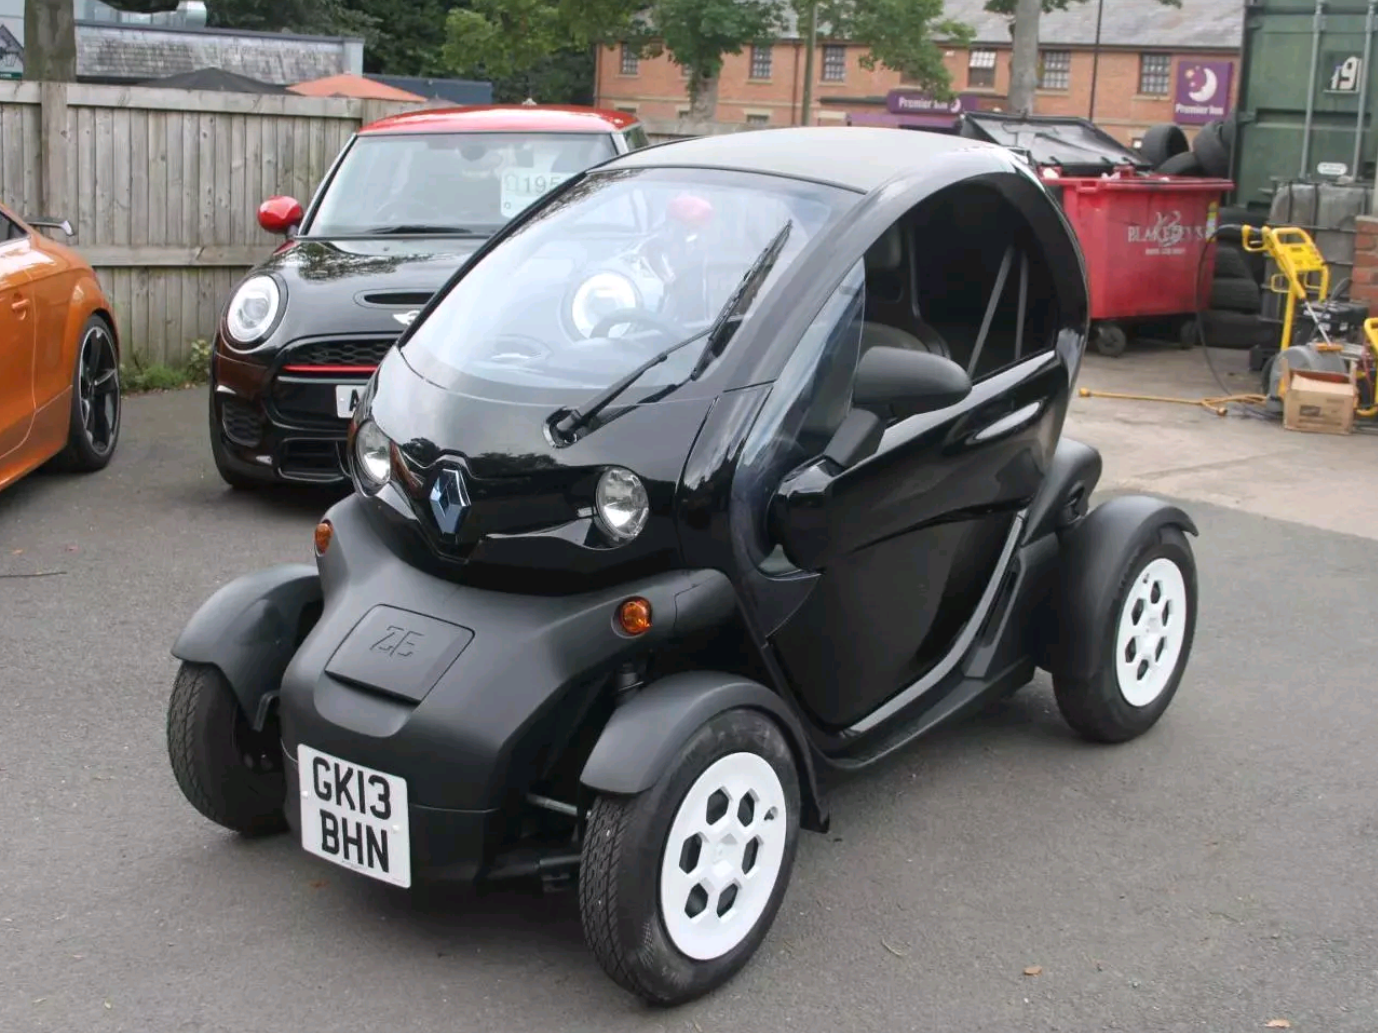

Its a blast to drive, gets the heads turning, and costs as little as 60 pence a charge to do 50 miles (Prices were before Russia Invaded Ukraine). It can also be tuned using a PowerBox plug in module, and the lack of modifications just makes me want to find a way to make this already rare and unique vehicle, a little more special.
Camping and Caravan Club – Sandringham
Nothing on this holiday had been arranged other than the first stop at Deepdale, which incidentally was done the the morning we left home. The second stop of our September holiday, sy. Sandringham Camping and Caravan Club, was booked on the fly also. We were comfortable with this as it’s late in the season, and the sites are not likey to be busy.
We arrived late morning, but couldn’t check in until 1pm. So parked in the car park and had a few hours cycling around to get out bearings. We knew that the Saturday was going to be by far the best day of the weekend, so we saw no reason to sit idle until we could access the campsite, and thought we would appreciate our accommodation more after a little exercise.


After approximately 3 hours we collected the van and were and entered the camp site. The grounds were really picturesque and we had lots of flexibility regarding pitch location. We didn’t realise until waking the site later that afternoon just how big it was, but ironically we feel for a location within a stone’s throw from the entrance with close access to toilets and shower block.

We awoke on Sunday to the forecasted rain which left us both feeling lethargic. We climbed out of bed well after 9am, and struggled to do anything but drink tea & coffee with the heater on for much off the morning. Breakfast became brunch and as we approached midday the rain turned to drizzle, and finally stopped. At this point we both knew it would be in our interest to take this opportunity to stretch our legs and get some fresh air before cabin fever kicks in. Initially we circled the perimeter of the campsite having a nosey at the variety of caravans, motor homes and tents. Not long after the sun appeared, so our walk extended to the forest behind the entrance, so all in all the day was a nice combination of chill and exercise ?